Friday, December 21, 2018

Holiday Update from Jesse

I wanted to post an update on some projects and developments coming down the line, but first wanted to wish all of my fellow T-scale enthusiasts a Happy and Peaceful Holiday Season!  2018 saw a rekindling of my excitement in T-scale and 2019 will certainly be a big one judging from the amazing things coming out of other modelers' workshops.

I am continually seeking to develop new models, improve old ones..sometimes to the point of distraction.  However, sometimes a special request gets me motivated, or another modeler doing something.  Two cases in point:

I recently decided to make the EMD SW9/1200 EMD switcher since it's so common, and after successfully making it (and still making improvements) a Canadian modeler said "Boy it sure would be nice to have an SW1200RS.."   This is the GMD (Canadian) built and specially modified version of the SW1200.  It rides on Flexicoil trucks so those were put together.   Well it really didn't take too much to modify it, so I have added that to the product line.

Oh and notice--horns and bells (oh my).  Boy are they fragile, but they are there-- on mounting pins that can be drilled.  Also included are extra stacks if you want to model the CP version with the standard exhaust stacks.   The GP40 model also has horns and bells and in that case the bells are the underframe version).


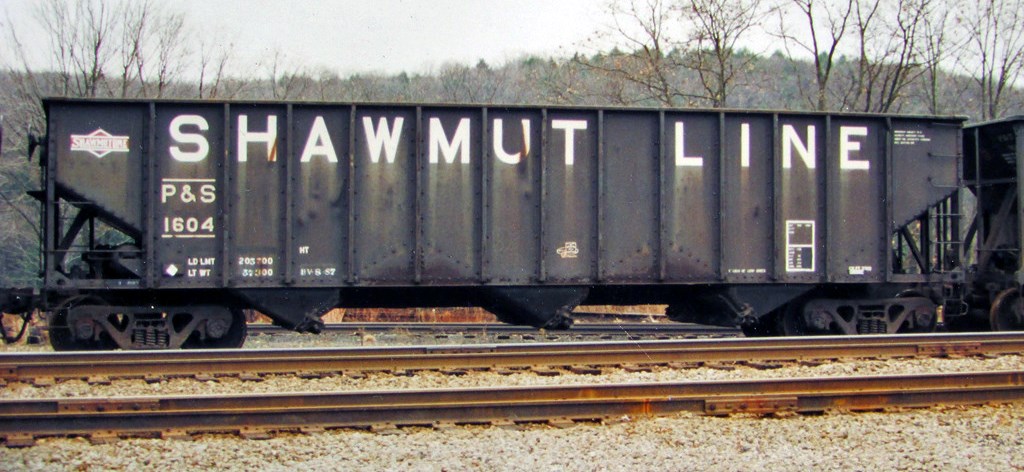
The other motivation was the display of TGauge.com's big steam locomotive.  This was a big freight engine that hauled strings of boxcars across the plains of the US.  Years ago I developed a 40' boxcar, but it was fairly primitive.  So... I updated it, with better detail such a roofwalk and brake gear, and the neat new improvement is that the Bettendorf trucks have "talgo style" CCE #3 couplers built in.  This was motivated by the lack of space for the coupler separately when the improved truck design is used.  I needed the talgo/truck mount for other projects as well such as the 3-bay hopper.

A replica of the private car "Puget Sound" was recently completed, and it turned out quite nicely.  Those windows are clear "glass" made of decal film, but the dome is Krystal Klear.  This was originally a Great Northern Ry. Dome Coach so any GN or Amtrak modelers may want one.  I'll be adding it to the product line as soon as I can validate the truck design as it will also need the talgo trucks. 

In other news-- I'm testing some tiny 1/32-inch thick x 1/16 diameter round magnets from K&J Magnetics,  These are made of "N52" grade and are stronger than the regular ones.  These guys seem to work pretty well, and it takes 2-4 to hold a car reasonably in place on the track.  Necessary for the un-powered models especially.

Thanks for reading, and Happy T-Scale Modeling!

Monday, December 3, 2018

How To Video: TGauge.com Needle Point Wheelset Assembly

I use TGauge.com "Pin Point Wheelsets" for my free rolling trucks (bogies).  When I first purchased them I wanted to save a little by getting the un-assembled set of 20.   After a lesson in frustration trying to assemble them with tweezers and pliers and bare fingers, and sending a couple flying into the void, I devised a way to assemble with a pin-vice and some tacky foam strip.  Here's a video illustrating the procedure:


Friday, November 30, 2018

Project Updates

Since the last post I've made quite a bit of progress on several fronts.  Here are the details:

Turnout prototype:  The #10 dummy turnout (it's permanently lined in one direction) was a qualified success.  I have additional slightly revised models on the way from Shapeways, and included detail such as an switch machine and hand-throw switchstand with lantern like the B&O used.  It looks great, and rolling stock makes it through without issue.  It's designed to be compatible with the roadbed strips (also improved to be stronger).  If you want turnouts, a set of two is available on Shapeways, and so are the roadbed strips.
  I'm almost ready to start laying track on a test module!

Trucks:  I modified the trucks (starting with the AAR switcher trucks used on the SW7, and have since updated the Blombergs, see photo.  This includes improving the robustness of them to not break so easily, and to retain the wheelsets better.  I'm satisfied, and will be rolling out across all the trucks as is feasible, and adding to kits with the shells.  The GP40 is out there with the new trucks.  The only issue is this new design is that it's tough to incorporate on smaller trucks like the roller bearing trucks;  I came up with an alternative I'm testing now and will post as I get prototypes back.

SW9/SW1200:  The dummy SW9 is out there (it's visually identical to the SW1200, hence the slash) in the shop now, in a kit which includes the new AAR switcher trucks and a horn and bell.. I'm not sure they'll print successfully but you can't say I'm not trying to push the limits :-)  I painted one up in Conrail paint as SW9 #9000 using some scavenged N-scale decals.  The number was from freight car data, cut down to size.   All in all I'm quite happy with this model!  I'm anticipating getting a powered boxcar, and have a short train of SW9/box/box/caboose..


Speaking of cabooses.. I'm in the process of revising the NE Caboose to include better detail, truck and couplers.  (Same applies to much of the lineup..) Plenty of work to do until next time! 

Wednesday, November 14, 2018

"T" easers and Pleasers

It seems like I have too many projects going on, but progress is being made.  There's just so much testing and re-testing that needs to be done until I'm satisfied (I'm probably one of Shapeways' best customers...) but the pace should settle down once I have the basics covered.

Trucks are on the list.  I need trucks that are substantial enough to take some abuse, hold the wheelsets, and still look reasonably good.  I have the latest batch of test trucks on the way.  There's a suspension that holds the axle in place a bit better and is actually sprung.  I call this the Union Jack suspension since it has several cross-shaped support structures.   I have Blomberg B's, some AAR switcher trucks, and internal bearing test subjects coming.  These are in 2nd or 3rd generation at this point and getting better with each try.

I also am trying horns (and bells) again.  Cross your fingers.  I made some jewelry recently that shows the process (lost wax) is capable with the dimensions I  need, but previously SW declined to try.  Maybe they will print them now??

Oh and this experiment is also on the way (inspired by a post on Facebook..).  It's a dummy but, it's a step towards something functional.  It should work for a fixed line turnout anyway with Code 40 rail, which would be fine for my non-switching layout (the way I figure it, functional turnouts can be located behind the scenes for changing the line of trains).   If it works, I could make straight or diverging versions..

I also made a section of tie strip with roadbed.. the ties are really very fragile, so the roadbed should help make them more rugged and it's designed for a ballast coating to make it look realistic.

As if all this wasn't enough, I'm still refining the GG1, I did an SW9/1200 (SW7/8 if you chop a stack off), and refined the GP40.

Stay tuned, I'm shifting into more of a modelling mode (less computer design) to do some work on a dome car project/small display.  I can't afford all the Shapeways orders anyway!

--Jesse

Thursday, November 8, 2018

Next Up: Trucks

aka Bogies..

The needlepoint wheelsets fit into the new trucks, but they aren't all that solid.  If you put much presure on them, they'll slip--the sideframes are just too thin and flex a little bit.  So, still not perfect.

Some time ago, I made some prototype "internal bearing" passenger trucks to fit on the Amfleet coach which incorporated a "snap fit" for the axle between the wheels.  Test #1 was too small and snapped, not quite rugged enough either.   I then got distracted with other projects and tabled it. 

Recently, I was putting wheelsets into a set of Blombergs and I having a heckuvatime keeping the wheelsets in.  This isn't acceptable-- there must be a better way.  So I combined the idea of the internal bearing truck with a tab that holds the wheelset in place.  Prototypes are on the way..  It only takes a few iterations to get it right, aka persistence pays off as shows with the coupler.

Wednesday, November 7, 2018

Introducing the CCE #3 Coupler

A package arrived in the mail yesterday, this one containing the prototype #3 couplers.  This project is a big deal to me--I've been wanting better-looking yet functional couplers in T-scale for a long time.  And to cut to the chase--I think these are a qualified success!

Appearance is good.  They are a knuckle style (aka Janney) coupler common to the US and other railroads around the world.  Although slightly oversize from prototype, this is not unusual for the world of model trains.  They come in a self-enclosed draft gear since I body-mount my couplers.  I  will also make a version that can be snapped into the existing coupler pocket for talgo style/truck mounted couplers. 

Functionality is good.  They pivot internally (once snapped free, as shown in the video) so that cars should be able to maneuver curves and turnouts built with the body-mount style in mind.  The jury may still be out as far as durability, but they seems pretty tough.  Check out the video: 


One design actually has a split shank so the coupler has a "spring" action, and so should be able to automatically couple-- but I found this didn't seem to work.. the split was too narrow.  I may have to re-test (to the point of destroying a coupler) because it might also snap free like the pivot action. 

I'm designing my railcar models now to accept the draft gear in a slot in the pilot, or even integrating the coupler on the model itself if necessary, and will be converting all older models to use the CCE #3 coupler. 

If you want to purchase a set click here: CCE #3 Coupler Set

Tuesday, October 23, 2018

The Pipeline

The past several months, I've been in a fever pitch to design new T scale (1:450 scale) models that are more accurate and appropriate for the North American prototypes I am interested in, primarily modern railroading from the 60's through modern time.  This includes a track system, couplers, trucks, modern hood diesels, structures, and some details such as truck trailers.

I'm particularly happy with the track, and the fact that now I can get decent-looking trucks using the TGauge.com needlepoint wheelsets. 


Yes, there is a great deal of testing still needed and other innovations..  powered Blomberg trucks, 3-axle trucks, turnouts--although another modeler on Facebook is hand-laying some beautiful ones!-- and working couplers (mine are press-fit/dummy..but I can envision a working system.)

Still, this progress feels good, and my enthusiasm is strong as ever.  I feel more and more that T scale is viable.  Maybe not as an operators scale just yet--we need automatic coupling/uncoupling-- but at least as a modelers scale with through trains on realistic curves.

Nearly every single day I think of something new that I want to design, or an old model I need to revise, to the point where feel my effort is getting diluted by too many projects.  The main limiting factor is time, and my spending power at Shapeways for new test printing!  Below is a list of models either somewhere in the design process, that I have designed and prototyped, redesigned/revised, or are now for sale on Shapeways in my store .

D = Design work started but not completed
P = Prototype testing/revising design in progress
F = Finished/tested new model.
R = Revised old model

Freight Cars
--60 foot boxcar shell -F
--50 foot outside post boxcar shell -R
--89 foot flatcar (TOFC flatcar) -P
--NE Caboose -P/R
60 foot boxcar in Bessemer & Lake Erie "Savings Bond" scheme. Decals from CMR Products/Netzlof Design


Passenger Cars
--Amfleet coach --P
--Celestory roof heavyweight coach --D

Locomotives
--GP40/40-2 -P/R
--SD40 -D
--GG1 -P
--RDC-1 -R
--RDC-4 -F
--F40PH -D
Test GG1 shell decorated with decals from CMR Products/Netzlof Designs
Trucks (bogies)
--Roller bearing freight trucks -P
--Inside bearing passenger trucks -P
--Blomberg B trucks -P
--Blomberg M trucks -P
--AAR type A switcher trucks -P

Accessories/Misc.:
--North American Tie Strips for Code 40 rail -F
--Knuckle coupler (dummy/press fit)-P
--53 foot dry van trailer -F
--45 foot dry van trailer -F
--40 foot dry van trailer -F
--Pennsylvania Railroad "Corridor Style" Tower, per Nassau Tower -F
Milwaukee Road 45' TOFC trailer with home-made decals (inquire if you want some).

On the drawing board:
--Open windows in all models such as passenger cars and locomotives
--More kits (shell plus trucks and couplers)
--EMD switcher
--Passenger trucks
--Powered bogies


I find the research and design process extremely enjoyable, but also getting the prototypes in-hand and doing the fettling and decorating is great as well.  I'm planning a diorama or possibly a "window box" type layout in the (near?) future with a back loop/train staging area with a front viewing box.

If you have an interest in any of these models listed above, or one you'd like me to design, please email me at ccetrains@gmail.com.  Some of my new models are available on Shapeways, several of the old ones, but some are not there because I have not thoroughly vetted them--if you have interest in being a guinea pig and testing them out, I'd love to hear from you.

- Jesse


Friday, October 5, 2018

T-Scale Track

The out-of-scale ties and tie spacing on the stock flex (and sectional) track was always a shortcoming of T-scale..  I developed a flexible tie strip system that, when combined with Code 40 rail available at TGauge.com, and ballasting and weathering, can produce respectable looking North American style track such as this:


Here's an example of the (painted and ballasted) stock flex track.. not great eh?.
 
It's ok--but not a great representation of North American railroad track as seen here.

When TGauge.com started selling their code 40 rail, I started thinking I might be able to craft some decent looking tie strips to use with the rail to better create accurate tie size and spacing.

I had a couple prototype tie strips made, and the latest results are very promising.  I intend to use this system to make a working module/diorama in the future. Here's a short test strip I made and painted;  Compare this to the stock flex track and prototype:


 The tie strips were made in Shapeways Finest Detail Plastic material;  Since it was a test, I made strips only 10 cm long, however they can be added together to make as long as you need (the code 40 rail comes in 50 cm lenths).   For printing--I will lengthen them to whatever is reasonably printable in Shapeways for the price.  Here's what it looks like after trimming from the sprue:


I'm obviously still trying to figure out the best technique for this track but here's what I have so far.

1.  Prep:  Wash the strips as with any 3D printed model.  First, using a soft brush I wash with acrylic airbrush thinner (it cuts the acrylic "goo" remaining on printed models), then wash gently in soapy water.  Let dry thoroughly.

2.  I give a brush coat of Future. 

(The above two steps apply to all my 3D printed models from Shapeways).

3.  Trim the sprues and any broken ties off and arrange in as straight a line as possible.  (I will be getting some double sided tape to use for this step to hold ties in place, but it's not necessary.)

4.  Get a rail and using the first section of ties, hold the rail in tweezers and gently press into the slot in the ties.  Make sure the "fat side" of the rail (look at the cross section) is down.  It should click into place with a tiny bit of pressure.


5.. Continue to the end of the rail, arranging more ties (even onesy-twosey) and click into place.

6.  Repeat for the 2nd rail.

7.  Apply another coat of Future which gently adheres the rail to the ties.  Here's the end result:

...  The rest is un-tested...

Sections should be joined by rail joiners or soldered.  Not sure what soldering would do to the ties, so heat sinks should be used.  The strips appear flexible enough to bend to a prototypical radius, but I haven't tried to see how tight it will curve.  I plan to adhere the track strips with a good contact cement to the roadbed.  Ballast can be applied using conventional techniques.


Wednesday, October 3, 2018

Windows in T-Scale

Some time ago I created some passenger coaches and decorated them.  At the time, I had made the coach windows "open" instead of just recessed into the car body as an experiment.  I wasn't sure if this technique would yield good-looking results. I had intended to use Microscale "Krystal Klear" to do the windows.  I tried it and they looked ok but not great.  There was a noticeable concave look to the windows.  

Since my decorating technique utilizes decals for much of the paint as well as lettering, I have a ton of spare decal film laying about (as do most modelers) and thought--well that stuff is clear-- I wonder how it would do as window glass?  I applied a band over the windows and surprisingly it turned out looking great.

I recently revised the RDC-1 model and decided an RCD-4 would be a good model, but this time make the windows "open" and try the decal film glass technique.  I made a prototype of the RDC-4 and along with finding some things to correct, painted up the shell to test the glass.  

Below are some tips on this technique.  Oh and all my models will have their windows "opened" over time..

1.  I use the generic "MicroMark" or other clear decal film, but any film should work.

2.  The interior of the body and especially window frames are painted black.  The exterior is then painted--in the case of the RDC, it's silver.  Notice how "hollow" the windows look without "glass".


2.  Next, I cut the decal film to fit, with a healthy (20% or so at least) overlap.  For single windows (like the end door, or baggage or passenger door) I just cut a square, or for consecutive ones (like the 3-in-a-row) I cut a strip. 

3.  Decals are dipped in water, and MicroSol applied to the window frame, and the decal slid into place over the window frame.  Another healthy application of MicroSol is applied after in place.  In the picture, you see one side completed but still wet with MicroSol.  The decal will sag as the solvent does it's job as on the door window.


4.  After drying, the decals shrink and tighten up in the frame to form nearly flat looking glass.  However, they are almost too clear!  The final step remedies this. 

5.  A shot of Dullcote gives the windows a more consistent sheen.  End results:


Thursday, September 27, 2018

Northeast Corridor Items

I have the preliminary designs completed and waiting for test models from Shapeways of the following:

  • GG1 body and chassis
  • Amfleet Coach
  • "Corridor Style" Tower (based on Nassau tower at Princeton Jct., NJ)
I have so many projects but feel I'm making good progress but perhaps getting divided into too many.  I always like to make a test print to validate any models before releasing them, so it may be some time before they are for sale to the general public.  If you have interest in these please let me know.


Saturday, September 22, 2018

New Hopper and CMR Decals

I had mentioned the fine Netzlof Design decals sold by CMR Products in a previous post and wanted to share another project utilizing their decals. 

Some time ago I made a 3-bay hopper, which I recently revised to add more detail, and the results are attached.   The new hopper body is in the store.  Now, I still need the roller bearing trucks (still working on them..)  Oh and some COTS decals!

Here's the prototype: 


And the 1:450 scale model:


Friday, September 21, 2018

T Scale Track Proof of Concept

Seems like I have a million and one T-scale projects going on.. one of them is to come up with a better representation of North American track (mainly crosstie size and spacing) using the smallest (Code 40) magnetic rail available. 

As a proof of concept, I made up some "flex track" ties and got a test print back; More improvements needed but, the difference is, to my eyes, fantastic!  I'm pretty fired up--stay tuned as I refine this model.

Tuesday, September 18, 2018

Princeton Jct. in T-Scale Concept

When I was a teenager, I accompanied my sister and mother on a trip east to look at colleges.  One stop was at Princeton.  I requested to be dropped off at the Princeton Jct. station on the Northeast Corridor and spent a great afternoon watching and photographing E60's, GG1's, Conrail and SEPTA trains.

Fast-forward 40 years and I am thinking about an idea for a T-scale layout/diorama of the Princeton Jct. station that would allow for a 4-track mainline under catenary, with Conrail diesels and Amtrak trains. 


Which got me thinking of developing a few models in T-scale to use on such a layout.  I have 3 prototypes in the works that would fit nicely.  They all still need refinement but I am making progress.


One of the other benefits is I am developing an internal bearing bogie which can also be used on the bi-level coaches.  Still, lots of work to do but I'm very productive lately.  The biggest snag is the cycle time to get prototypes from Shapeways.  Speaking of which, several models previously mentioned are on the way and/or being revised.

Tuesday, September 11, 2018

A Couple of Developments

One of my sources of "prototype futzing" with T-scale has been the couplers.  The stock couplers, with their square/angular oversize appearance, just don't look much at all like real couplers--at least those found in North America (or some other parts of the world, Australia, South America, etc.).  They might have some redeeming quality if they actually were operational, but they aren't (although the good people at T-Gauge.Com are developing a T-scale coupler that has some automatic coupling capability!).  I don't forsee T scale being much of a switching scale for the time being, but I do want more prototypic rolling stock for the "roundy-round" style I want, so I set about trying to make a better coupler, more resembling the standard knuckle coupler found in the US.

First, I scaled down a typical prototype coupler in the US (the Janney Coupler) and printed in what materials I could on Shapeways.  At the time this was only the old "Frosted Detail";  but the results not only were these just too small, but far, far too fragile.  So I scaled them up and printed them in bronze.  This was semi-successful.  The fit was so tight I needed pliers to get them apart, and the cost was outrageous (somewhere around $15 for a set of 4).  There were no other alternative materials, and so the project was set aside.

Fast forward a few years, my interest in T-scale rekindled.. and some additional material options available on Shapeways.  I tried the "Professional Plastic" and it seemed to have promise.  After a couple tweaks to the design I printed what you see below.  They come on a small sprue and printed in a gray material, so I painted a rust-brown color.


Note they are holding together unaided.  It is a decently firm grip--but not so tight you can't separate them.  The material is grainy in texture, but paint seems to fill in the texture, even looking a bit like cast iron.  They are somewhat flexible and are remarkably strong and resilient.  I found I had to sand/trim them a bit to fit through the pilot hole in the GP40, reducing the horizontal profile a bit.


Yes they are still over-sized but they are small enough and prototypic-looking enough for me to be "good enough".  I will be striving to make them smaller and see how small I can get.

Monday, September 10, 2018

Progress Update

--Newly available to purchase:
 2-packs of 40-, 45- and 53-foot trailers on a sprue/base.

Prototypes being made at Shapeways currently:
-- 89' intermodal flatcar.
-- 60' smooth-side hi cube boxcar.

-- Track bed (North American prototype).  This track bed will have North American tie spacing and is designed to accept the Code 40 rail available from T-Gauge.com.  My goal is to make more realistic looking track.  This will just be straight/curvable sections, but if the concept works it's possible turnouts and other trackwork may be added.
 -- RDC-4 design added with "open" windows and under-body detail is in process and awaiting test model.


Test models received from Shapeways:
-- 50 foot outside post modern boxcar with improved details.
-- 3-day open hopper revised and test model received and looks good as well.  I will post pictures shortly of both this and the boxcar. 
-- Knuckle-style couplers work better, but still need some adjustments to drawbar.
-- Blomberg and Roller Bearing Freight trucks, need adjustments for proper width.

Wednesday, September 5, 2018

Busy T-imes

I have been extremely busy lately designing and evaluating new models, and revising old ones.  Here are some of the updates:

-- 50 foot outside post boxcar revised with better details.-- 60 foot smooth side boxcar added.
-- RDC-4 design added with "open" windows and under-body detail (will revise RDC-1 similarly if this works.  I want to try Krystal Kleer as the window material.)
-- Added both 53 foot and 45 foot trailers and did custom designs.
-- Knuckle-style couplers being modified to look and work better.
-- Blomberg B, Blomberg M, and Roller Bearing Freight trucks in the pipe designed to work with needle-bearing axle wheelsets.

Also in the pipeline: 
-- EMD F40PH
-- Inside-bearing passenger trucks
-- Celestory roof coach (80-foot)

Blue sky on the white board:
-- 89' flatcar
-- Track bed (North American prototype)
-- Opening up windows on passenger cars to allow for use of "Krystal Kleer" style or other windows.
-- Amfleet coach


Tuesday, August 28, 2018

R&D Findings

I've been very busy lately designing some new models and testing out decorating ideas and techniques...  I mentioned several of the projects previously so lets get into some of the results!

Trailers:  53' foot dry van trailers are very common in North America "over the road" and the 45's were a very common TOFC trailer.  The trailers turned out well from the printer--details are rendered nicely.  I designed the 45's on a sprue so they can be produced en-masse more easily and safely--although Shapeways has been extremely good about making some of the smaller items and I have not experienced any broken items recently (knock on wood!)   Here they are after a wash with some warm soapy water, a couple brushed on coats of Future, a bit of light sanding, then a couple coats of Tamiya white primer.  And some more sanding as you can see.


The home-made decals for the trailer are turning out to be much harder to produce than the 3D design actually.  Finding the "sweet spot" on my Epson printer can be a design-by-design thing.  Bleeding ink on the decal paper is my nemesis--any color causes bleeding.  It may be due to the secondary market inks I'm using though.. I'll have to try genuine Epson inks and see if that makes a difference.  The ink works fine on glossy photo paper, just not on the standard clear decal paper.  

RDC model update:  Using the 23M chassis available from T-Gauge.com, the trusty RDC can be powered with a visually "ok" truck (bogie) placement.  Technically, the 23M trucks are too closely spaced at about 54 scale feet, but it looks acceptable at arm's length.  I will try correcting it to prototype length, which will require some surgery on the chassis, but as this is the longest powered chassis available "off the shelf" I figured it would be good to show how it looks.

Also note the coupler design.  I wanted a more prototypical US coupler so I designed this in "professional plastic".  Yes it is way too big, but compared to the stock couplers and the models are a bit "fuzzy" but I think it's ok.  It's strong enough but still needs some tweaking to couple/uncouple reliably.  And I'm reducing the size a bit.  Oh, and here's a look at the horn mounted on the RDC.  Of course they had to be made a little too large for prototype as well, but again--a good representation at arm's length.  

So, now it's on to some painting and decorating!  Check back soon.

Tuesday, August 14, 2018

Trucks and Trucks and Horns Oh My

Long overdue for a rework/development effort were the Blomberg trucks.  After all, there's a GP40, and MP36, FP7's all needing proper 4-axle trucks.  Originally these were just sideframes so I created dummy trucks from them.  I also improved the Blomberg B trucks (the older ones) and created Blomberg "M" trucks which are the more modern ones with the dampener on the leading axle. 

A semi trailer was also in the offing.  Pretty simple when it comes down to it and I'll be making 40', 45' and 48' versions as well.


What does a GP40 or an RDC need to warn 1:450 scale trucks at grade?  A horn of course!


All of these are in test printing right now and if they come out ok I'll release them on the Shapeways shop.

How about one of these ex Lackawana/EL electric MU cars?  I'm about 75% done with one...


And still working on a semi-scale knuckle coupler.  It's really difficult because of limitations on materials... but it will happen.


Saturday, August 11, 2018

Conrail GP40 Unpowered Model

Although I still fully endorse the "full side decal" process I started getting interested doing some models with standard decals as a painted finish is admittedly better.  Well, and I became frustrated with the performance of the print-your-own decal paper and lack of white ink.  The inkjet decal paper is just too thick and doesn't seem to respond to MicroSol to conform to the details.  

So, perusing the web I found CMR Products who does print-on-demand decals in odd scales like O and Z.. and they were very happy to do several of their sets for me in 1:450. And good news is I am a fan of the roadnames they already make.

I had a GP40, FP7/9 and few boxcars undecorated from my shop (Shapeways "Smoothest Fine Detail Plastic")  so decided to give the fine folks at CMR Products a try -- I emailed and they were very glad to make decal sets of their existing artwork re-scaled to 1:450, and for a very reasonable price!

The GP40 from Shapeways was washed in warm soapy water, with gentle scrubbing with an artists bristle brush.  After drying, it got a coat of Tamiya Fine Surface Primer from a rattle can.  I touched up a few spots with a sanding stick, then another coat of primer.  Then a coat of Tamiya semi-gloss black..  Then a few of the rougher spots remaining from 3D printing got 2-3 brush coats of Future.  When that was done, the whole model was brush painted with Future (clear acrylic).  Decals were applied and some touch ups done.  

As you can see, the decals were crisp, opaque and accurate.  They handled extremely well, especially given the tiny size.


I added an air reservoir tank above the fuel tank, made of a piece of electric wire with the end conductor exposed a tiny bit, and painted black.  I maybe should have removed the Chessie style rock plow on the pilots.. but eh.  It's T.  So, the GP40 is ready for trucks and couplers, and a horn to boot, plus weathering--but that's another story (stay tuned).
 

Friday, July 20, 2018

I'm baaaaaacck !

After a couple of years away from T-scale modeling due to a move, job changes, and a sabbatical, I've gotten back to my 1:450 scale avocation.  There are some things going on behind the scenes regarding business development as well, but for now I'm going back to my old shells and development of US/North American prototype equipment and getting them kick-started again.  First up is an RDC shell done in the CN noodle black/red scheme.  Very distinctive.  Now to modify a mechanism to fit.  I had hoped the new HST mech would fit but no such luck.  Anyway, stay tuned to see what's on the workbench!