Had a little time to work on the track this weekend, I put down some additional ballast and playing around with the technique a bit. It's pretty forgiving-- I'm finding some bits I didn't like I can patch up. Little scraps of roadbed can be rolled up a-la playdoh worms and spread where needed. The ballasting is being affixed after arranging with a brush with a shot of dullcote, then a few drops of thinned matte medium after that has dried.
This corner is Etna, BG tower will sit in the corner closest to the camera. I need to add the ex-PRR industrial track to the Tippins Machine Works, which will be a 70-degree (or so) crossing. The crossing will be non-functional.
News and information about my model railroading and the designs made by CCE Models.
Tuesday, May 28, 2013
Monday, May 27, 2013
A New Tool (or Toy)
I've been using my cell phone camera (a Samsung Galaxy S) for most of my pictures.. (err. well I can't remember the last time I used my old Canon PowerShot for anything!!) The camera phone resolution is good enough for web use, but the macro feature isn't all that powerful. After reading a post on the T-Gauge.net Forum in which a member was showing photos in need of macro focus, I did a search on Ebay and found this. The price was right so thought I'd check it out. It's a small add-on lens to the phone camera, which is secured by means of a magnet in the lens itself. You can attach a self-adhesive metal disc that holds the lens in place on the phone as well, although mine has a metal plate that works. Here are some test photos.
Above, the up-coming Bombardier Bi-level coach, to be paired with this:
The FP7/9:
And some closer views of the "experiment" track:
While I think I need to do a little more experimentation to get the best results, it's an improvement over the standard camera in my phone. Now to complicate matters, I just ordered a new smartphone (Nokia 928). This has a really nice Carl Zeiss lens on it, and it may have a good macro feature already. It does have a much larger sensor (i.e. more megapixels) We'll see!
I have been working ballasting the P&W layout so will update the blog with that and more macro photos soon.
Tuesday, May 21, 2013
Modelers Perogative and Track Laying
As I got down to work beginning to lay track, I started to balk at the idea of so many slightly ambitious sub-projects on this test layout-- the Allegheny River Bridge in particular. After all, I really just want to validate T modeling techniques and get a nice roundy-round layout that I can use to demonstrate the scale, perhaps at a few shows in the region. Truth be told, I haven't worked on a layout in over 20 years either, so many of my skills are pretty rusty. e.g. soldering, scenery, etc. I was starting to feel as if I'd bitten off just a tad too much.
So, as is my right as a model railroader and lord over the lair, I tore up the basic scenery and went back to a flat-top design for the little 2x3 layout. I have retained the basic shape, and will still incorporate some hills and dales. What will be omitted is the Millvale/Willow Grove area which will likely become just single track running through some hills; Instead of a backdrop/divider, there will be a central ridge with a tunnel at one end. Willow Grove, I'm thinking, may become Wildwood (further west on the real P&W), and I might even put a coal load-out there. I'm still going to try model the Etna area near BG tower as well.
Anyway, another track technique update: I put down the roadbed and finalized the loop! See below picture-essay.
One thing that is pretty annoying about T-gauge flex track is the "twist" it tends to develop when curved. It torques for some odd reason. I had thought the aggressive tack of the roadbed would be sufficient but even that wasn't enough. I have therefore popped a screw in to hold it temporarily. The ballasted roadbed with a layer of matte medium I HOPE will be enough to hold it in place. Or else, I will resort to more mechanical restraints for the pesky trackage.
AMI roadbed cut into 12mm wide strips:
Roadbed down. Note: It is NOT firmly pressed in place yet!
Pre-painted track laid in place (again, not firmly pressed down yet):
Aligning the track and the roadbed..
The prototype railroads use a tamper/liner for this. I use an x-acto knife.
At this point, the ballast is be sprinkled in place and the entire system tamped with a finger. I ended up sealing with some thinned matte medium. I also had sprinkled some black weathering powder on the system. A little touch up on the rail is needed. I think it looks pretty decent as some weathered mainline rail.
Sunday, May 12, 2013
Improved T-Track Technique using T-Gauge Ballast
I previously wrote about using uncured butyl rubber (AMI instant roadbed) for my T-gauge roadbed. I was not 100% happy with the end-result because it seemed like the texture was not quite granular enough. It looked--in a word-- a little too "rubbery".
Recently, the fine folks at T-Gauge UK has begun offering some super-fine gray ballast. I purchased some with the idea of testing it out on my roadbed. The uncured rubber roadbed is pretty sticky, and the ballast can be pressed into it easily. My test turned out very positive. I will definitely be using this technique. First, the ballast gives the roadbed a nice granular, rock-like look. Second, it does not need as much painting/tinting to look better.
The roadbed is cut and placed as in the original procedure. Track is pre-painted as well, and pressed into place.
The ballast is simply sifted on with a folded piece of paper--and tamped with a finger.
The shoulders are also tamped with a finger and with the sanding stick--also as in the original technique. Then the excess is vacuumed up. Finally, the whole kit and kaboodle is sprayed with some Testors dullcote (don't forget to clean the railheads). Very simple--very easy. The picture speaks for itself.
And another view:
Note the nice texture--this is what was missing on the original technique. Finally, here's one with the 50' boxcar--which incidentally has a powered chassis installed.
Recently, the fine folks at T-Gauge UK has begun offering some super-fine gray ballast. I purchased some with the idea of testing it out on my roadbed. The uncured rubber roadbed is pretty sticky, and the ballast can be pressed into it easily. My test turned out very positive. I will definitely be using this technique. First, the ballast gives the roadbed a nice granular, rock-like look. Second, it does not need as much painting/tinting to look better.
The ballast is simply sifted on with a folded piece of paper--and tamped with a finger.
The shoulders are also tamped with a finger and with the sanding stick--also as in the original technique. Then the excess is vacuumed up. Finally, the whole kit and kaboodle is sprayed with some Testors dullcote (don't forget to clean the railheads). Very simple--very easy. The picture speaks for itself.
And another view:
Note the nice texture--this is what was missing on the original technique. Finally, here's one with the 50' boxcar--which incidentally has a powered chassis installed.
Monday, April 29, 2013
P&W Update
It's been a while since I posted an update! Between business demands and spring having "sprung" with it's associated diversions, I haven't done much modelling. However, a rainy day allowed me to do a little work on the P&W layout.
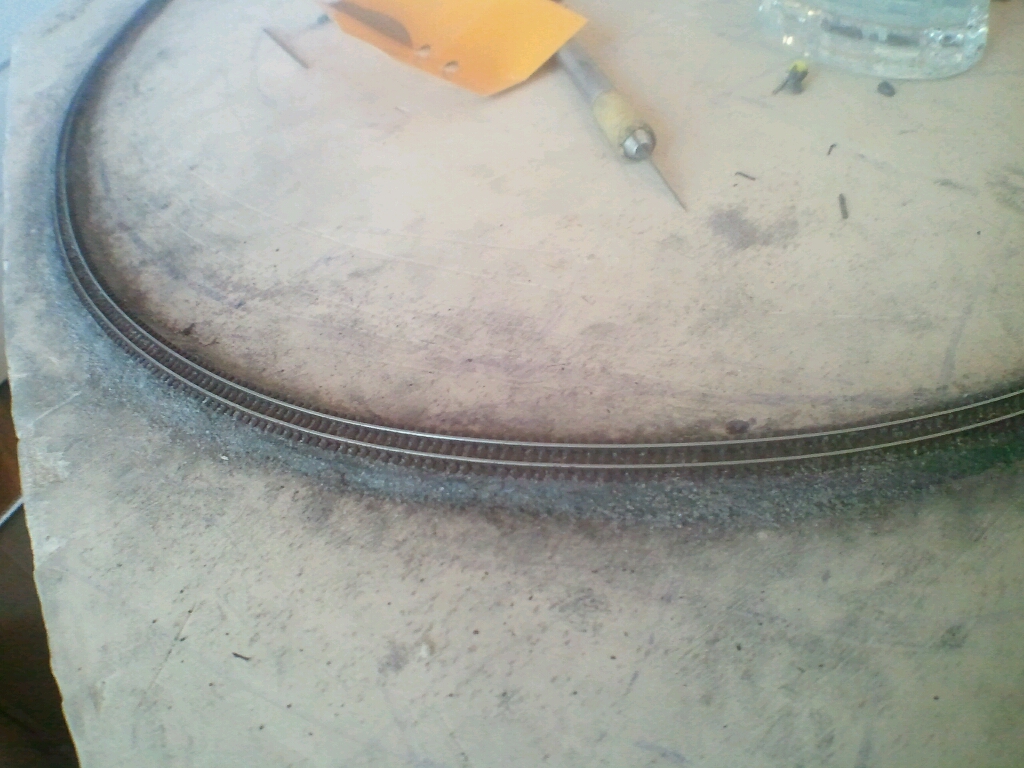
Most of the framework has been cobbled together, a bit sloppily--but it will do. The next step is laying the basic trackwork. I will use my butyl rubber/AMI roadbed technque. But first, I need to get the flextrack arranged and 'test fit'. Also, I want to solder most of the joints to provide more reliability in operations. So this weekend I bent up the track for the basic kidney-shaped oval and did a few solder joints. I'm using MicroEngineering Code 55 rail joiners by the way, they seem quite snug on the T-gauge rail. After painting and some weathering they should be relatively inconspicuous.
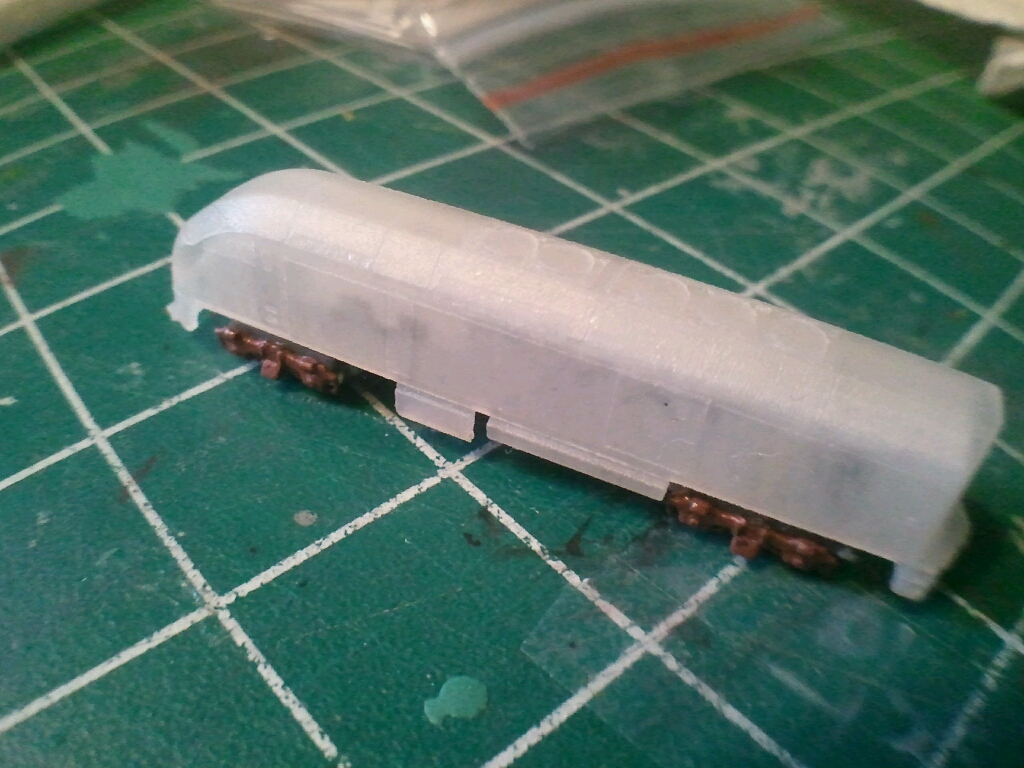
The big trench here in pink will be a back channel of the Allegheny River, spanned by the through-truss shown in the following picture. This is an N-scale bridge but seems appropriate for what was a pretty massive mainline double track bridge.
BG tower will sit at about the location of the white push-pin, and there will be a crossing there as well. Access to Willow Grove yard will be via the ramp seen at bottom-right (even though the prototype is not on a curve). My debate now is what do do about the turnouts, which I will probably render as dummy only in this iteration.
Here's an overhead shot of the "kidney shape" layout. I'm surprised at what can be done in 2x3 feet, it seems about the equivalent of a 5x10 in larger scales based on how the curves appear. The sharpest curve on the layout will be in the bottom right, which I plan to partially conceal in a tunnel (Schenley Tunnel). A scenic divider will split the layout top/bottom. You can see the contours of hills on the Allison Park/Etna side (top).
Hope to show some more consistent progress in the near future. Roadbed and bridgework will need to be done next!
Friday, March 22, 2013
New 50 Foot Boxcar
The 50 foot boxcar is one of the most prevalent pieces of freight rolling stock found in North America. When I got into 3D printing of T-gauge models, the 50-foot outside braced boxcar was the first model I made. Since that time, the original has "lost it's shine" as they say! I wanted more detail and more options.. so earlier this year a re-design was done. The model was made hollow, which makes it a candidate for powering. This is important because in T-gauge, the locomotives typically will struggle to pull more than 3 pieces of un-powered rolling stock. If the goal is modeling 20-car freight trains--or there-about--powered revenue equipment is needed. In addition, the choice of doors was improved by offering three types: A plug door, a "Youngstown" door and a "Superior" door. These make it possible to model a wide variety of boxcar prototypes. Thirdly, the roof detail was improved. Other details--such as a brake wheel or grab irons--can be added by the modeler. I've contemplated making etched brake wheels just for this reason!
Here's the model from Shapeways, after washing in warm soapy water and a gentle scrub with stiff bristle artists brush, then a few thin coats of "Mr. White Surfacer 1000". Note the un-finished door parts on a sprue in the background.
This prep work does two things: 1.) It fills in some of the roughness of the 3D printed surface; and 2.) It provides a white surface, good enough to decal on with my home-made clear decals.
The surfacing paint is actually a very thin putty mixture; It can be gently sanded between coats to make a more smooth surface as well. The white color is needed because the ink-jet printer used for my decals cannot print white (nor can any other normal ink-jet). Therefore, the white lettering or graphics are clear on the decal, and the background (the model) must be white and seen through the decal. Many of the colors printed also need a white background to look proper.
Next, the door was installed. I used the plug-door choice. The part was held in place with a bit of thinned Krystal Klear (I really like this product for my T-gauge modeling!) I used this as an adhesive so if I wanted to change it--a quick soak in warm water would release the door.
Note: Evident here is the bottom sill being just a bit too thick (back to the drawing board to fix). In the meantime a little sanding will fix that!
I wanted to model a plug door boxcar, and the P&LE would be an appropriate "fit" for my Etna layout. Here's the prototype:
After a bit of trial and error getting the size and spacing right, I got the decals straight. The application consisted of three parts; The left panel, door, and right. Micro-Sol was used to get the decal to snuggle between the ribs and into the door. Any exposed white areas were touched up with a bit of green made from PC Green, mixed with some blue and reefer white to get the right shade of green. The roof still needs to be painted of course.
Here is the decal artwork if you want to make your own! Feel free to use for your own non-commercial uses.
Tuesday, March 19, 2013
BG Tower has some details added.
BG Tower needed a few items to complete it, such as the staircase. Scratch building a staircase in 1:450 scale was a daunting idea, so I turned to our ship-modeling friends for some help. Gold Medal Models (outstanding products!) makes a detail set for the USS Arizona in 1:429 scale that includes several detail parts that will work in T, among them several stairways. These aren't -exactly- what I wanted being based on an all-steel prototype, but close enough and good for effect.
Above you see the length of stairway and a platform. The prototype rests on a couple wood beams; I found some scrap brass to create these. Note: on the final model I installed "X" braces made of thin styrene. If I was smart I would've installed them at this stage. I added them later.
Some very finicky work with super glue and all was installed.
I also needed a smoke jack; The construction drawings call for a masonry chimney, but BG actually just has a steel tube flue. I used a cut-off shaft from a thumb tack, and a small bit of brass shaped with a ball-point pen to be somewhat concave ACC'd on top. The figure is part of a 1:450 Queen Elizabeth 2 sailor set, repainted into blue from his dress whites.
When installed, the ground level will go up to the top of the white foundation.
Subscribe to:
Comments (Atom)


