Monday, December 18, 2023

Fall-Winter 2023

In Shops Now... CCE Models Products

This fall I began supplying CCE brand kits and parts to two retailers:  TGauge.com (with worldwide distribution) and Fusion Scale Hobbies in the USA.  So far, this inventory is of CCE couplers, some passenger car kits (the Budd fluted-side Parlor Car and a CN smooth-side coach) plus the TrainMaster (N&W and some other versions).  Check out these retailers and inquire about CCE products if you don't see stock.  While you're at it--buy a few FP9s and 6-axle powered, and adjustable chassis to stock up.  And the Pin-Point wheelsets.. buy a 20 or 100 pack as there are several freight cars and an F7B coming that will need them.  Remember, if you want to see more new products in this new scale, the manufacturers need to see support.  I purchased a couple Class 67s even though I don't model UK!  They are still great models to own.

Other developments:  

As mentioned, the Budd fluted-side parlor car (PRR design), a CN lightweight coach and a CN baggage car have all been shipped to the shops noted above and fit the Adjustable Chassis.  The CN cars closely resemble those of other roads if you aren't too picky.  Just decorate them appropriately--the following may be helpful:

A decal set is available for the passenger cars that has markings for multiple companies and can be used on any of the cars.  Fusion and TGauge.com both should have these in stock.


Several new road-specific versions of the TrainMaster have been made, including SP, Reading, Southern Railway, and Virginian, along with decals. I'll be sending a couple of each to the retailers.  The N&W model is in stock at Fusion currently and should be at TGauge.com as well.

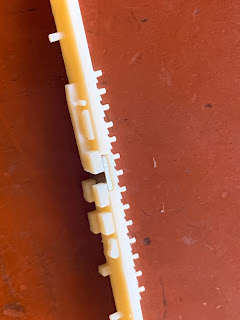
Hoppers old and new:  I designed a new 80-ton open hopper and re-designed the 100-ton open hopper to go along with the N&W Train Master.   Here's the N&W 80-tonner showing the end bracing--all 3D printed and robust enough to not break very easily.


I also did a refresh of the ACF 4750 cu ft covered hopper (a la PRR-Conrail H-45) so it's 100% 3D printed including end bracing and ladders.  This saves the trouble of bending the etch which was quite difficult to get right.  The details and contours were also improved.


 WP&Y Layout Update:

The lake (Bernard Lake) has been poured!  I used Woodland Scenics "murky water" with the lake bed painted with WS olive drab and tan shoreline, with a blend between the two done with airbrush.  Overall it was pretty easy and took two full pours (about 2 pints).  The shoreline has the usual surface tension thing that happens with these poured resin waters...  I may play around with some matte finish to mitigate the leeching effect and build up the shore ground texture a bit near the water.  The background rock and foliage was airbrushed with some light gray to blend it with the backdrop, which was printed by a friend in a continuous strip.  Overall, I am satisfied with the effect of looking across a wide lake with forced perspective.  Now to finish the foreground scenery adding some trees, etc. install the Fraser water tank/station.. then run some trains!  I need to paint up a pair of the DL535Es...


This has been another year of tremendous growth for T gauge, and I think 2024 will be even better!  I hope everyone has a great holiday season, and look forward to more modeling in the New Year.

 Until next time! 

 - Jesse  (email any questions or requests to me at ccetrains "at" gmail)

Tuesday, August 15, 2023

Late Summer '23 Update

In Shops Now... an RTR CN FP9!

The big news of the summer is the release of a North American prototype locomotive that is fully decorated and ready to run: an EMD FP9 in the classic Canadian National "tiger stripe" livery.   I worked with the manufacturer of T Gauge models in China to get this extremely accurate 1:450 scale model to market.  It was quietly released in late July and is currently in stock at TGauge.com.  

Here's a pic out of the box, albeit with a flush pilot insert w. CCE coupler.


These are 3D printed and so are not quite as strong as an injection-molded body.  This is important when doing any modifications as the shells can (and will) crack if squeezed or pushed too hard.  I'm amazed at the painting and printing--colors are opaque, separations crisp, and the number boards are legible.   

 I'm currently finalizing a super detail kit for the FP9 that will make it just a bit more accurate for us rivet-counters.  It includes:

  • Pilot insert with a CCE (or scale) coupler
  • CCE couplers that plug into the standard coupler draft gear on the trucks
  • Fuel tank cover
  • Blomberg truck sideframes
  • Clear inserts for the windshield, cab windows and portholes.  
Given the size of the model, it goes without saying that these details take a bit of patience to add, but the end result is worth it.  Here is the windshield insert being test-fit.  Note it's secured with a tiny bead of Krystal Klear around the edges.  The RTR FP9 model actually has a fairly thick layer of paint, therefore the fit of the windows has to be a little more relaxed.  Ask me how I found this out, a couple broken shells later...


Here are the cab windows and portholes installed.

Other developments:  

In order to have something appropriate for the FP9 to pull, I've made getting some passenger cars to the TGauge shop a priority.  I have a Budd fluted-side parlor car (PRR design), a CN lightweight coach and a CN baggage car that have all been updated to accommodate the Adjustable Chassis.

 I also have an F9B that can be used between two powered  FP9's to make A-B-A or A-B-B-A lashups.  And decals.


In addition, here's a Budd bi-level gallery car in SP colors along one of the H24-66 locomotives being developed.  I have the decals for the SP Train Master and need to get to painting it.  A nice layout of San Francisco commuter trains could be possible!

3D Printing Developments: New Resins and Blends 

The biggest project of the summer has been adapting to some new resin blends.  3D printed models using the standard Phrozen Aqua 8K resin are pretty tough, but could still use some additional strength.  I read about a blend of Aqua 8K and Onyx Impact Plus resins, and after a bit of trial and error work I got the blend dialed in on my printer.  It's now my standard as it's quite a bit stronger than the Aqua 8K by itself.

I was advised to try another resin--Sunlu ABS-Like resin--because it's supposed to be strong/flexible and takes good detail.  As a bonus, it comes in clear.  This opens up the possibility of doing locos in clear and masking off the windshields for a one-piece model.  We'll see how it performs in tests.

I also experimented with Voxelab transparent and Onyx Impact Plus to make a smoke-clear resin to use for windows.   So far I am happy with the results.

WP&Y Layout Update:

The layout is progressing, the mile 5-6 segment is mostly complete, the Fraser side is coming along.  I've added a depression for the lake, and will be trying one of Woodland Scenics water products in it.  It's been painted in olive drab and yellow near the banks.  Some rock/scenery also has been added, and a rough draft of the backdrop printed.


For those of you who have made it this far.. here's a little gift from CCE Models:

Free Plug-in Style CCE Coupler STL file 

The CCE coupler is a much more accurate representation of the "Janney" knuckle coupler than the stock T Gauge couplers for us North American (or Australia/NZ/S. Am.) modelers.  These CCE couplers will plug into the stock coupler pocket on T gauge locomotives or rolling stock.  They do not require the spring.  There are 3 different sizes that can be used where longer or shorter drawbars are needed. 

If you want the RTR couplers, I intend to make sets available at TGauge.com.  

But you can download and print these yourself (for non-commercial use only and there is no re-distribution or modification allowed without my permission.)  You will need to have the equipment and expertise to print them.  That being said, I recommend printing using a strong, high-detail resin (I print at 20um, using 80/20 blend of Phrozen Aqua 8K/Onyx Impact Plus).  Other resins may work.  Also, my experience is that Shapeways print materials are not strong enough for these couplers.

I wanted to make these available for free as an incentive to help us modelers achieve more realistic T-scale trains for the non-European/Japanese markets.

 Until next time! 

 - Jesse  (email any questions or requests to me at ccetrains "at" gmail)

Thursday, May 4, 2023

Magnetic Weight


Just a quick post to pass along some experience I've acquired using magnets as "weight" in T-gauge rolling stock.   I was penning an email to a fellow modeler on the subject and thought I should just share this.. so here we go:
 
As most of you know, the physics of T-gauge (and other small scale railway models) is quite challenging.  Un-powered rolling stock models are typically so low mass, even with weight added, that they are extremely difficult to keep on the track.  Locomotives get around this with magnetized wheels.  Weight can be added to your other stock, but the size is so small that you can't really add enough in most cases.   Several years ago I came upon neodymium magnets--rare earth magnets that are very strong for their size.  I found they could be purchased in sizes that could be concealed in T-gauge rolling stock so got some to experiment with.  I've since found my favorites and have been pleased with the results.

Where do you get them?  There are several suppliers, but I (in the US) get mine from K&J Magnetics. 

I use two sizes/styles:
When I design models I provide recessed areas for the magnet;  In theory one could drill holes I suppose.  
 
Here is a 3-bay hopper.  Note the spine of the car has cylindrical cut-outs for the magnets.  The magnets install flush with the spine to allow for a profile that hides them--not that many people are down at trackside view at 1:450 though.  With paint they are basically invisible. 
 
Here's a passenger car frame set up for the block magnet.  It will invisible when installed as part of the frame.


Installation can be tricky due to the size and strength of the magnets.  Get a pair of plastic tweezers because any tweezers of ferrous metal won't be able to "drop" the magnets.  Are there non-ferrous tweezers?  And the installations like the hopper are tough because the second magnet always wants to jump to the first one.. but it can be done.

To secure them, I secure with Krystal Klear -or- UV cured adhesive (or ACC) when speed is needed.  Notice how the magnet is invisible after installation.


How well do they work?  Pretty well!  I don't want the pull force to be so much that the car isn't movable, but you also want it to hold the car to the tracks.  Frame height is the rule of thumb for me.  
 
Here's the hopper car with two round magnets securing it. Note how the car is tipped about 30 degrees and doesn't fall off the rails.  But it still rolls nicely.

I hope this helps!  

I'll be publishing a new update in a week or so with some other news and follow-up on my various projects.  - Jesse

Tuesday, March 28, 2023

1Q 2023: More Projects than Time

CCE Models:  If you're interested in an older CCE model printed by Shapeways, feel free to email me.  I have a bunch of old prints that I'm willing to part with for basically the cost of shipping since the resin I'm using now is so far superior in terms of finish and durability.  I'm also going through old designs and revising them with better details or improved fit/finish, making the old models obsolete.  For example, I'll be re-doing the bi-level gallery cars, the 1:450 hoppers, and more.  I'm also semi-seriously thinking about doing some retail kits--I made some sample FP7 kits (shell and decals) in a few roads.  Feel free to inquire, as these would be excellent test models to practice on or just a bargain, if you're willing to go with the older material.

3D Printing:  I did successful tests of the clear Voxlab resin for windows in a CN lightweight coach as well as the 1:300 coach and DL535E.  The windows are very satisfyingly flush, and easy to install compared to my other techniques--Krystal Klear and clear decal film.  I'm setting up my 3D workshop with two separate vats:  One for Aqua 8K Gray, and one for Clear.  Saves time cleaning, etc.  I did my first FEP change-out as well, and thanks to YouTube for the easy-to-follow instructions!


T Scale Narrow Body (GP38) Chassis:  This is still on the back burner;  I've been working on models that are "drop on" for the existing chassis for now, like the H24-66 (see below).  To be continued...

New and Improved T Scale FP7/9):  The RTR FP9 model is still in development, some back-and-forth regarding paint schemes.  In the meantime, as mentioned I have some FP7 kits (shell and decals) put together.  If you want one, email me.  $10 each plus shipping.  Roadnames: B&O, SCL, MILW.  I've been refreshing the passenger cars that would be good pulled behind these, such as the CN lightweight coach, a Budd lightweight stainless steel coach, and the Gallery cars.

FM H24-66 "Train Master":  The experience with the DL535E on the 6-axle chassis lead to the thought of doing a "drop on" shell for the chassis in T-scale.  Fairbanks Morse's Train Master locomotive dimensions are close enough, and the prototype already has a slightly thicker hood than EMD or Alco locomotives, so I decided to test one.  It came together well, and the oversize hood thickness doesn't detract.  I'm testing some different paint schemes (Reading, N&W, and SP) and if you're interested in getting a kit for one of these, let me know--I'll probably do them similarly to the FP7.


Mn3 Rolling Stock: I finished up the two hopper designs and painted up one of each;  I will be testing some EBT rolling stock at a future date.  I have two DL535Es on the workbench just waiting for paint.

WP&Y Layout Update:  Scenery is almost done on the Bridge 6B side;  Many more trees and bushes from Dan at Scenerytime and a backdrop have been installed.  Rock was weathered with several washes of different colors to try capture the varied coloration from lichen, water, and dirt that washes down the faces.

 Track also got some weathering with dark gray chalks.

I also finished up the Fraser Water Tank/station.  This is 3D printed with some details added.  The ropes to raise/lower the spout are 0.13mm Tungsten wire.

Seems like the blog is taking on a "Quarterly" format so look for an update sometime this summer.  

- Jesse  (email any questions or requests to me at ccetrains "at" gmail)

Friday, January 20, 2023

New Years Update

Happy New Year Everyone!  It's time for an update on the T-gauge projects from myself and CCE Models.

CCE Models Availability:  I stopped selling through the website because I'm not really interested in selling as a commercial enterprise--I feel like I would have to make a bigger commitment of time than I'm able to make to "do it right".  I'm really just a modeler and enthusiastic T-gauger and occasionally I will sell a model or two, or some decals, to my fellow modelers.  Furthermore, the market is just not big enough for me to justify anything more than that right now.  That being said, I'm in discussions with a retailer who would stock up on a few of my kits and sell them.  All that being said, if you are interested in buying some models, feel free to email me and I'll do my best to accommodate you. 

3D Printing:  All production is now on the 3D printer and I'm pretty well dialed in.  It may still take multiple iterations of a print to get it right between supports and the model design itself but I'm refining my skills.  My printer (as mentioned before) is a Phrozen Sonic Mini 8K, and I really love this machine.  Game changer.  I use the Phrozen Aqua 8K resin with excellent results.  I have two new resins I need to test:  One is a clear resin (think: windows,etc) and the other is a rubber-like resin.

T Scale Narrow Body (GP38) Chassis:  This project is in hiatus while I work on some others.  It will go back to the top of the list before very long.

New and Improved T Scale FP7 (or FP9):  There is something in the works with a model manufacturer that will hopefully see the FP9 produced commercially as an RTR model within the year.  I gave them license to the design and am acting as consultant on the project.  For this reason I'm holding off selling the shells but I have several test models on the workbench.  Speaking of my workbench--it's a nightmare!  

I have a couple test models on the workbench--here's a PRR FP7.


Mn3 Rolling Stock:  I have several new designs that are completed for M scale (1:300) narrow gauge rolling stock;  Two hoppers and a coach.  The hoppers are totally new designs but were found on the WP&Y.  The first is an ex-CN longitudinal hopper, the other is an ex-East Broad Top hopper.  For the EBT hopper I have also made decals for the original owner as well as Durango & Silverton and WP&Y.  I am making these with some details I hadn't tried in the past in such a small scale, such as grab irons, and believe it or not they are printing successfully and are robust enough to withstand handling.  


I also refreshed my WP&Y narrow gauge coach (technically Combination Smoker, Numbers 214 & 216).  Originally this model had etched brass sides because Shapeways couldn't print smoothly enough.  My PSM8K is up to the task however and the sides are now integrated and have somewhat better detail around the windows and belt.  The troublesome part is the truss rods... I'm testing some alternate ways to achieve this using the printer, but may end up using etched brass in the end.  These are two test models, still not completed with the design:


WP&Y Layout Update:  The layout is progressing slowly as I refine techniques.  

Trackwork:  First an update on the track-laying technique.   Recall my note about the tendency of the T-gauge flexitrack to twist on curves, especially tight curves?  Well I noticed some sections where the track has pulled up and twisted a bit after ballasting, and kinked at a joint.  I think the wetting from ballasting loosened the glue holding the track down and allowed it to move slightly.  It's not very noticeable, but in the future I will hold down all curved track with Liquid Nails construction adhesive, or other waterproof cement.

I did power up the loop and spent several days running to-and-fro making sure there was continuity and trains ran properly.  It's really a short loop and I didn't even bother with extra feeders.  

Ballast is down around the layout now, and I'm starting scenery using a variety of ground foams and broken up hydrocal as boulders.  To be honest, scenery isn't my forte and I'm testing/refining along the way.


As I will need a bunch of them, I tested several ready-made (yet affordable) pine tree sources, and ultimately found an excellent one:  Dan at Scenerytime, who sells on Ebay.  The trees and bushes are excellent--see the pic below.  These pine trees (regular and dark) are much better than the others I have found that just look like bottle brushes.  Well worth checking out.  Note: The far right tree is a Scotch Pine (iirc) from a UK architectural supplier. 

Until the next installment, best wishes and Keep on Modeling! 

-Jesse