Given that there are extremely limited options for modelers in T-scale to find accurate scale model trains and accessories--especially of North American/US/Canadian prototypes--I have embraced 3D printing as a means of producing my models. As many of you know, I create and sell various T-scale items in my "CCE Models" store hosted by 3D printing service bureau Shapeways. Shapeways is a leader in this area and their Finest Detail Plastic material is simply the highest resolution 3D printed material available on the mass-market right now. I have been extremely impressed with their quality, service, and pricing.
My favorite railroad is the former B&O lines of the Chessie System Railroad of the 1980's. GP40 and GP40-2 locomotives were common on the Chessie System, and so I designed a T-scale model. It has since been improved upon several times and I sell it now as a "kit" including a choice of trucks (Blomberg B or Blomberg M), dynamic brake, horns, bells, CCE knuckle couplers, and a Chessie "signature" accessory--the rock plow pilot. The locomotive can be built as a GP40 or a GP40-2.
Here's what the kit looks like:

The main body and components are attached to a flat base by a series of sprues. When you get the kit from Shapeways it will be in a small poly bag, typically enclosed in bubble wrap in a large outer box. The preparation of the model begins with a wash to remove the oily/waxy gunk left over from the printing process. I go into detail of my washing process in a Blog post and it's also in the "Information" section of the Shapeways shop.
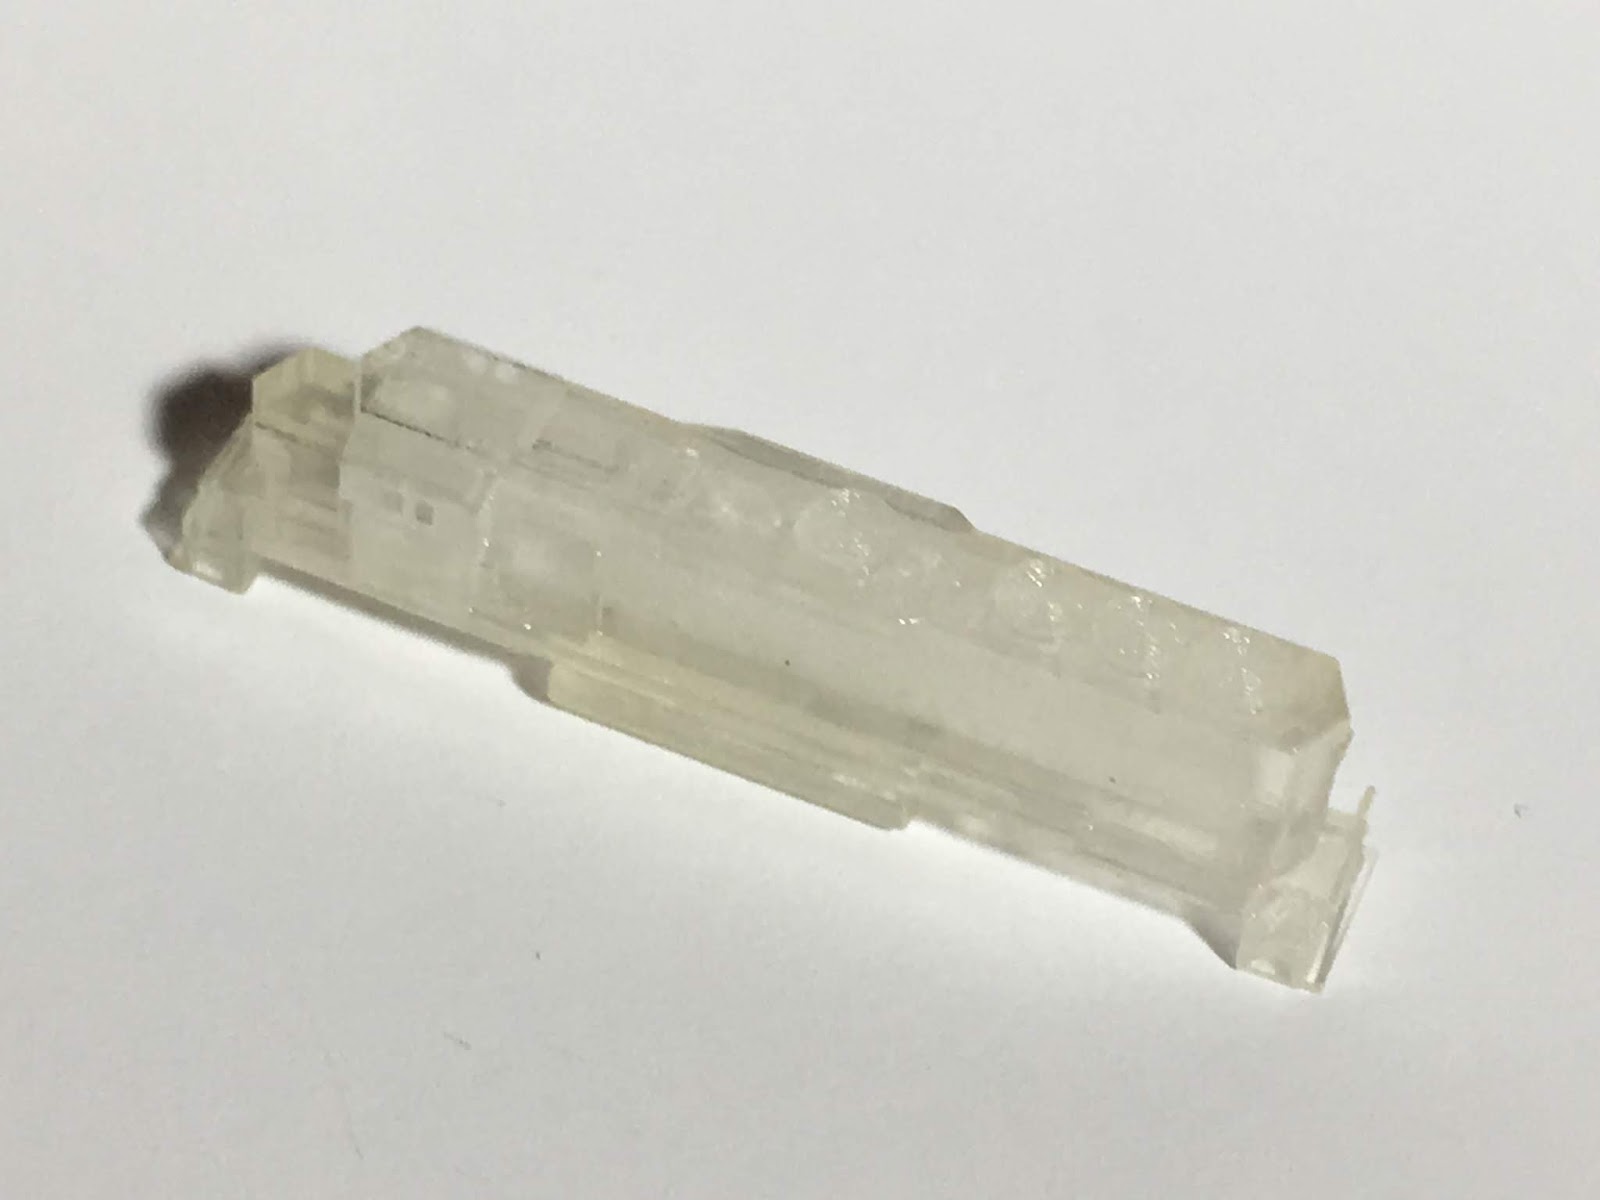
I separate the main shell from the base by careful cutting with a hobby knife and prep it for painting. Here's the "raw" shell-- it's a translucent acrylic material.
I drill a small (between 0.5 -1mm) hole or two in the underside of the model at this point for a couple reasons: First, it provides a point to secure a toothpick which is used as a handle for the shell during the finishing process. Second, the holes serve as a mounting point for the small (3/16") neodymium magnets I use to create a positive downward "pull" by the model to the tracks. If you are going to run these models--even as unpowered dummies as this model is-- they are so light they require added weight to stay on the track. The magnets provide artificial "weight" to the model.
After some basic clean up and sanding, the shell gets a coat or two of brushed-on Future acrylic clear floor polish, then a spray on coat of Tamiya fine surface primer. Imperfections are much easier to see after the primer. I sand areas that are too rough lightly between coats. I also try not to put on too much of either the Future or primer, because there's really some great detail that you don't want to obscure--fan detail, louvers, etc. There will likely be some layering/lines visible from the printing process but until technology improves further, I find I can live with some minor imperfection--and the models look fine from normal viewing distance. Here's what the shell looks like after primer applied and a little sanding:

Next we are on to main assembly, detailing, finish painting and decaling of the main shell. But of course--I always do research on the prototype before this. In fact, research is one of my favorite activities. In this case I am modeling Chessie/B&O GP40-2 "GM50" which was a unique paint scheme to honor the 50th Anniversary of GM's ElectroMotive Division, the locomotive manufacturing arm of General Motors. The internet has tons of reference material, just type in your subject in any search engine and you will likely get a ton of hits. I found this picture as it shows a lot of details, the color scheme, and placement of lettering.

Notice this unit has dynamic brakes--evidenced by the bulge above the "Chessie" and extra roof fan. The kit has the option to build the GP40-2 with dynamic brake or without. You will want to add these on now if you didn't before, as well as any other major components such as the rock plow (although on this build I forgot until later). I use regular ACC to attach such items.
On to the subject of lettering and decals: There just are not many choices for decals in T-scale. At my request, CMR Products has been great about reducing their line of decals by Netzlof Design to 1:450. You can order them upon request (and you can even select 1:450 on the website now). Even better, they are also working with me now to custom design some other new decals for Chessie and Conrail and N&W in 1:450 scale.
The GM50 wasn't one of these available at CMR--I designed and printed these myself on my trusty inkjet printer. In fact, most dark color lettering can be adequately produced on store-bought clear decal film for inkjets. Lighter colors/whites are basically impossible at this point as inkjets use the "white" of the paper or background, not a white ink. Blacks/Blues/Greens are typically opaque enough. The Chessie lettering is (technically) a very dark blue, but I use black because it really looks like black. My design work and printing is done with PhotoScape software, but there are many options. I just create a .jpg file--no need for ultra precision because these are reduced to such small size that it makes up for minor imperfections. Here's the GM50 decal image file, which you can use if you like; and technically there should be two of the 50th anniversary logos, one goes on the rear of the locomotive as well:


Finally we are ready for finish painting. The base color is Tamiya gold--it's actually a very simple scheme. Here's the shell with it's gold paint applied two light coats. It's starting to look solid! (Pardon the pun..)

Once the finish coat is on you can apply the decals and it will start to look like it should!

It's coming together, but we still need to add couplers, trucks, and finishing details.
Since I forgot to add the Rock Plow pilot earlier, I trimmed off the footboards and added them now to the front and rear pilots.
Add the couplers. CCE #3 couplers will pivot freely about 45 degrees left and right, but must be gently snapped free from a tiny pin inside the draft gear. I did a short YouTube video showing how to do this. Once working, slide the draft ear into the slot in the pilot. They should fit snugly with just a press-fit. I usually secure with a tiny bit of Future or MicroScale Krystal Klear. This is because it's water soluble and if I ever need to remove the coupler it can be loosened and removed. ACC wouldn't work because it would be stuck-tight!
Underneath the model, there are pilot holes for the trucks. Drill these out with a .75-.80 mm bit--the trucks are designed to be secured with a 1mm screw. I get my screws on Amazon and are sold in bulk for eyeglasses etc for a few dollars. You can add the TGauge.com pin-point wheelsets before or after mounting the trucks. I used the Blomberg "B" style trucks to suit the prototype.
I add the neodymium magnets at this point, and secure with a bit of Krystal Klear. I have many uses for this water-soluble clear goop! I hold them in place with a bit of tape until it dries.

Paint the trucks and couplers--gold for the trucks and I use Roof Brown for the couplers. The final step is to add the miniscule horn. I pre-painted it on the sprue and added it to a small hole in the cab roof. I put to in the kit for a reason--I destroyed the first one. As a finishing touch, I use Krytal Klear for small windows like the door and windshield, and use decal film for the cab side windows. You can apply weathering at this point although this unit was special so please keep it light!


