Thursday, June 10, 2021

Build Walk-Through: 1:450 Scale Penn Central X67 Class Boxcar

Last summer, the Conrail Historical Society magazine featured a series of articles about the Penn Central (and later Conrail and CSXT) X67 class of hi-cube boxcars used to transport auto parts.  I had been wanting to make a hi-cube boxcar for CCE Models and this excellent issue spurred me into action.  

Along with a history of the car, the article had drawings and dimensional data which I used (along with several reference photos) to design a 3D model.  A test model turned out pretty nice, except the doors were a bit of a sore spot.  Due to the small features such as the door rods, locking bar, etc. the 3D printing process made the doors look rough.  I had been thinking about trying to make boxcar doors of photoetch brass, so here was my opportunity to test this approach.  I adjusted the model design to omit the doors, and did the artwork for a photoetch double plug-door.  A few weeks later I had my PE frets and was in business!  

 Here's a step-by-step summary of the build of the CCE Models 86' Hi-Cube Boxcar (PC class X67):

Step one is to clean the model and prime it.  I gave the boxcar and the PE fret a shot of my go-to primer, Tamiya Fine Surface Primer (gray).

Next, I test fit and applied the PE door to the model using some Microscale Krystal Klear.

 
The door still needs the separate door rods (although you could omit them if you don't mind the lack of detail);  I cut the four door rods from 0.15mm brass wire to a length of 9.0 mm.  The door rods were applied using the small depressions in the door to align them properly and secured with a bit of thinned Krystal Klear.  
 

Once the doors and the end brake wheel (also included on the PE fret) were applied, another coat of Tamiya gray primer was applied.  This also helps seal the details to the model.

The next step was the finish painting.  I wanted to model the original car as used by the Penn Central seen below (photo from Hebners.net/Collection of Albert Phleep, photographer unknown).  The PC decals are included in the CCE Models X67 decal set along with the Conrail markings.
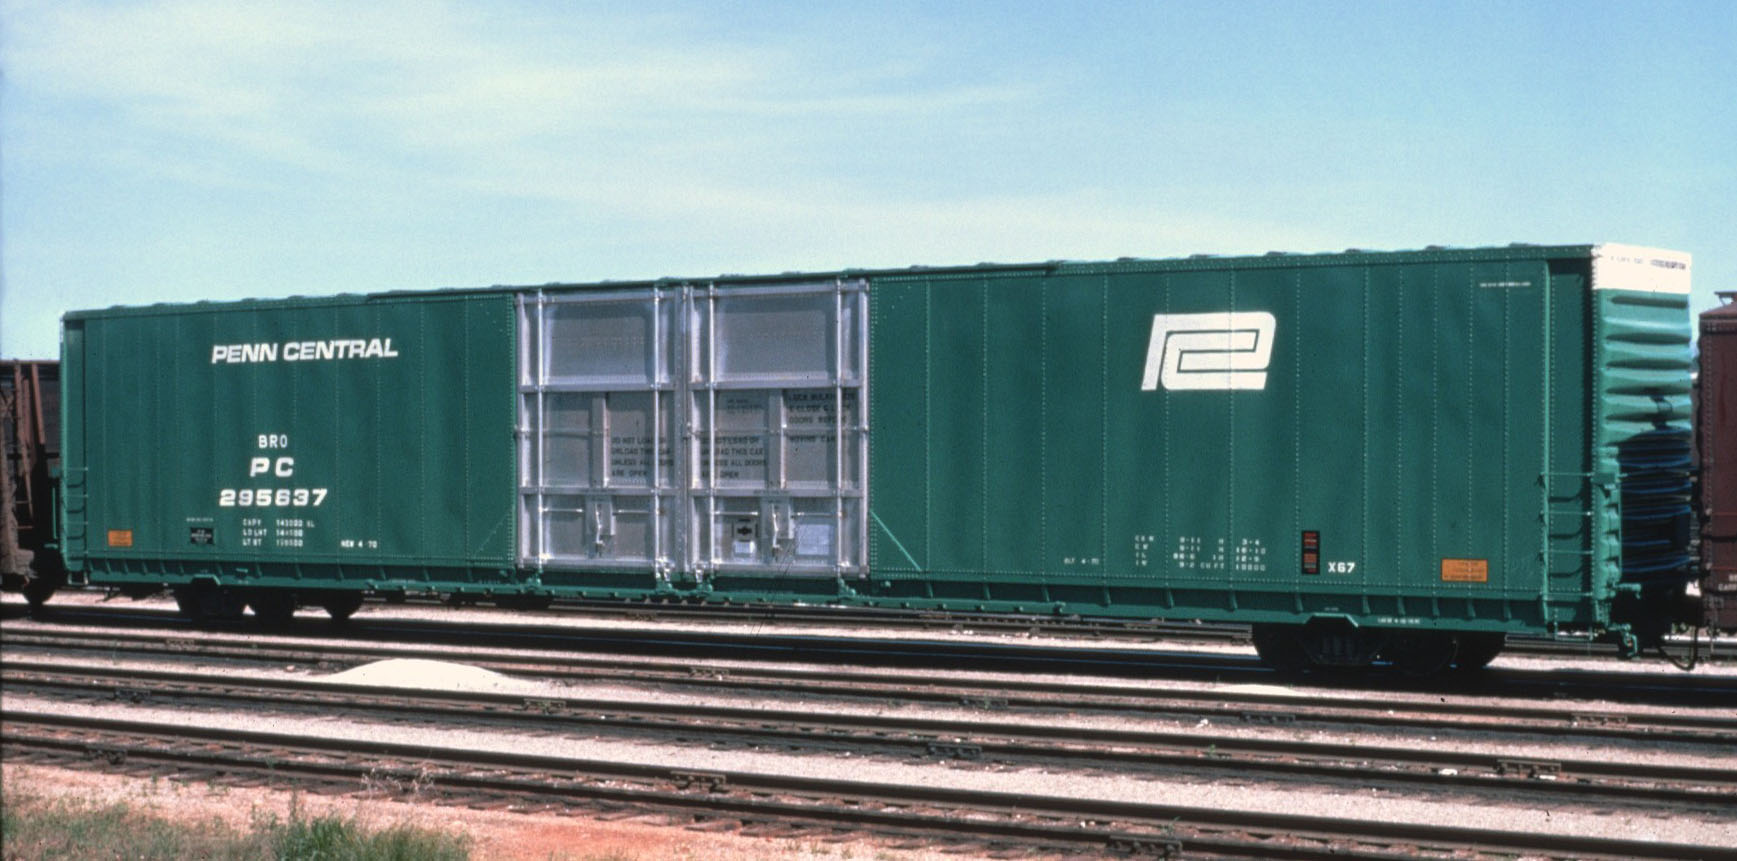


The roof appears to be unpainted on the original, and the doors are exposed aluminum as well, so the car was given a coat of a metallic silver from a rattle can.  I used my favorite metallic silver, Spaz Stix 10009, "Ultimate Mirror Chrome"--highly recommended (it can usually be found on Ebay and Amazon).

Once the silver had set, I masked the doors and roof.  I then airbrushed flat white on the top of the ends for the "excess height" band.  This band was also masked, and finally the whole car was airbrushed using Polly Scale Penn Central Green.

 
Removing the tape revealed the car in it's basic paint scheme.  I gave it two coats of Vallejo Gloss Varnish using the airbrush to seal the main finish and prepare for decals.
 

The decals went on easily, and I used the reference photo to help position them correctly.  MicroSet and MicroSol were used to get the decals to bond and settle to the surface, and after drying for a day, a coat of Vallejo Flat Varnish sealed them.

The frame and trucks were primed with Tamiya oxide red primer, and I then used Mr. Color rattle can roof brown to paint them an appropriate color for the trucks/underbody.  I also gathered some self-adhesive weights I had in the scrap-box to give the model better stability.  These came from an adjustable chassis set from TGauge.com

The trucks were assembled with Pin-Point Wheelsets from TGauge.com, and attached using the press-fit pins that come with the model.  The pins sometimes need to be slightly shaved/sanded (and/or the hole reamed out a bit) for the easiest fit.

Here is the assembled frame with wheelsets.

The frame assembly is an easy press-fit into the body, to complete the model:
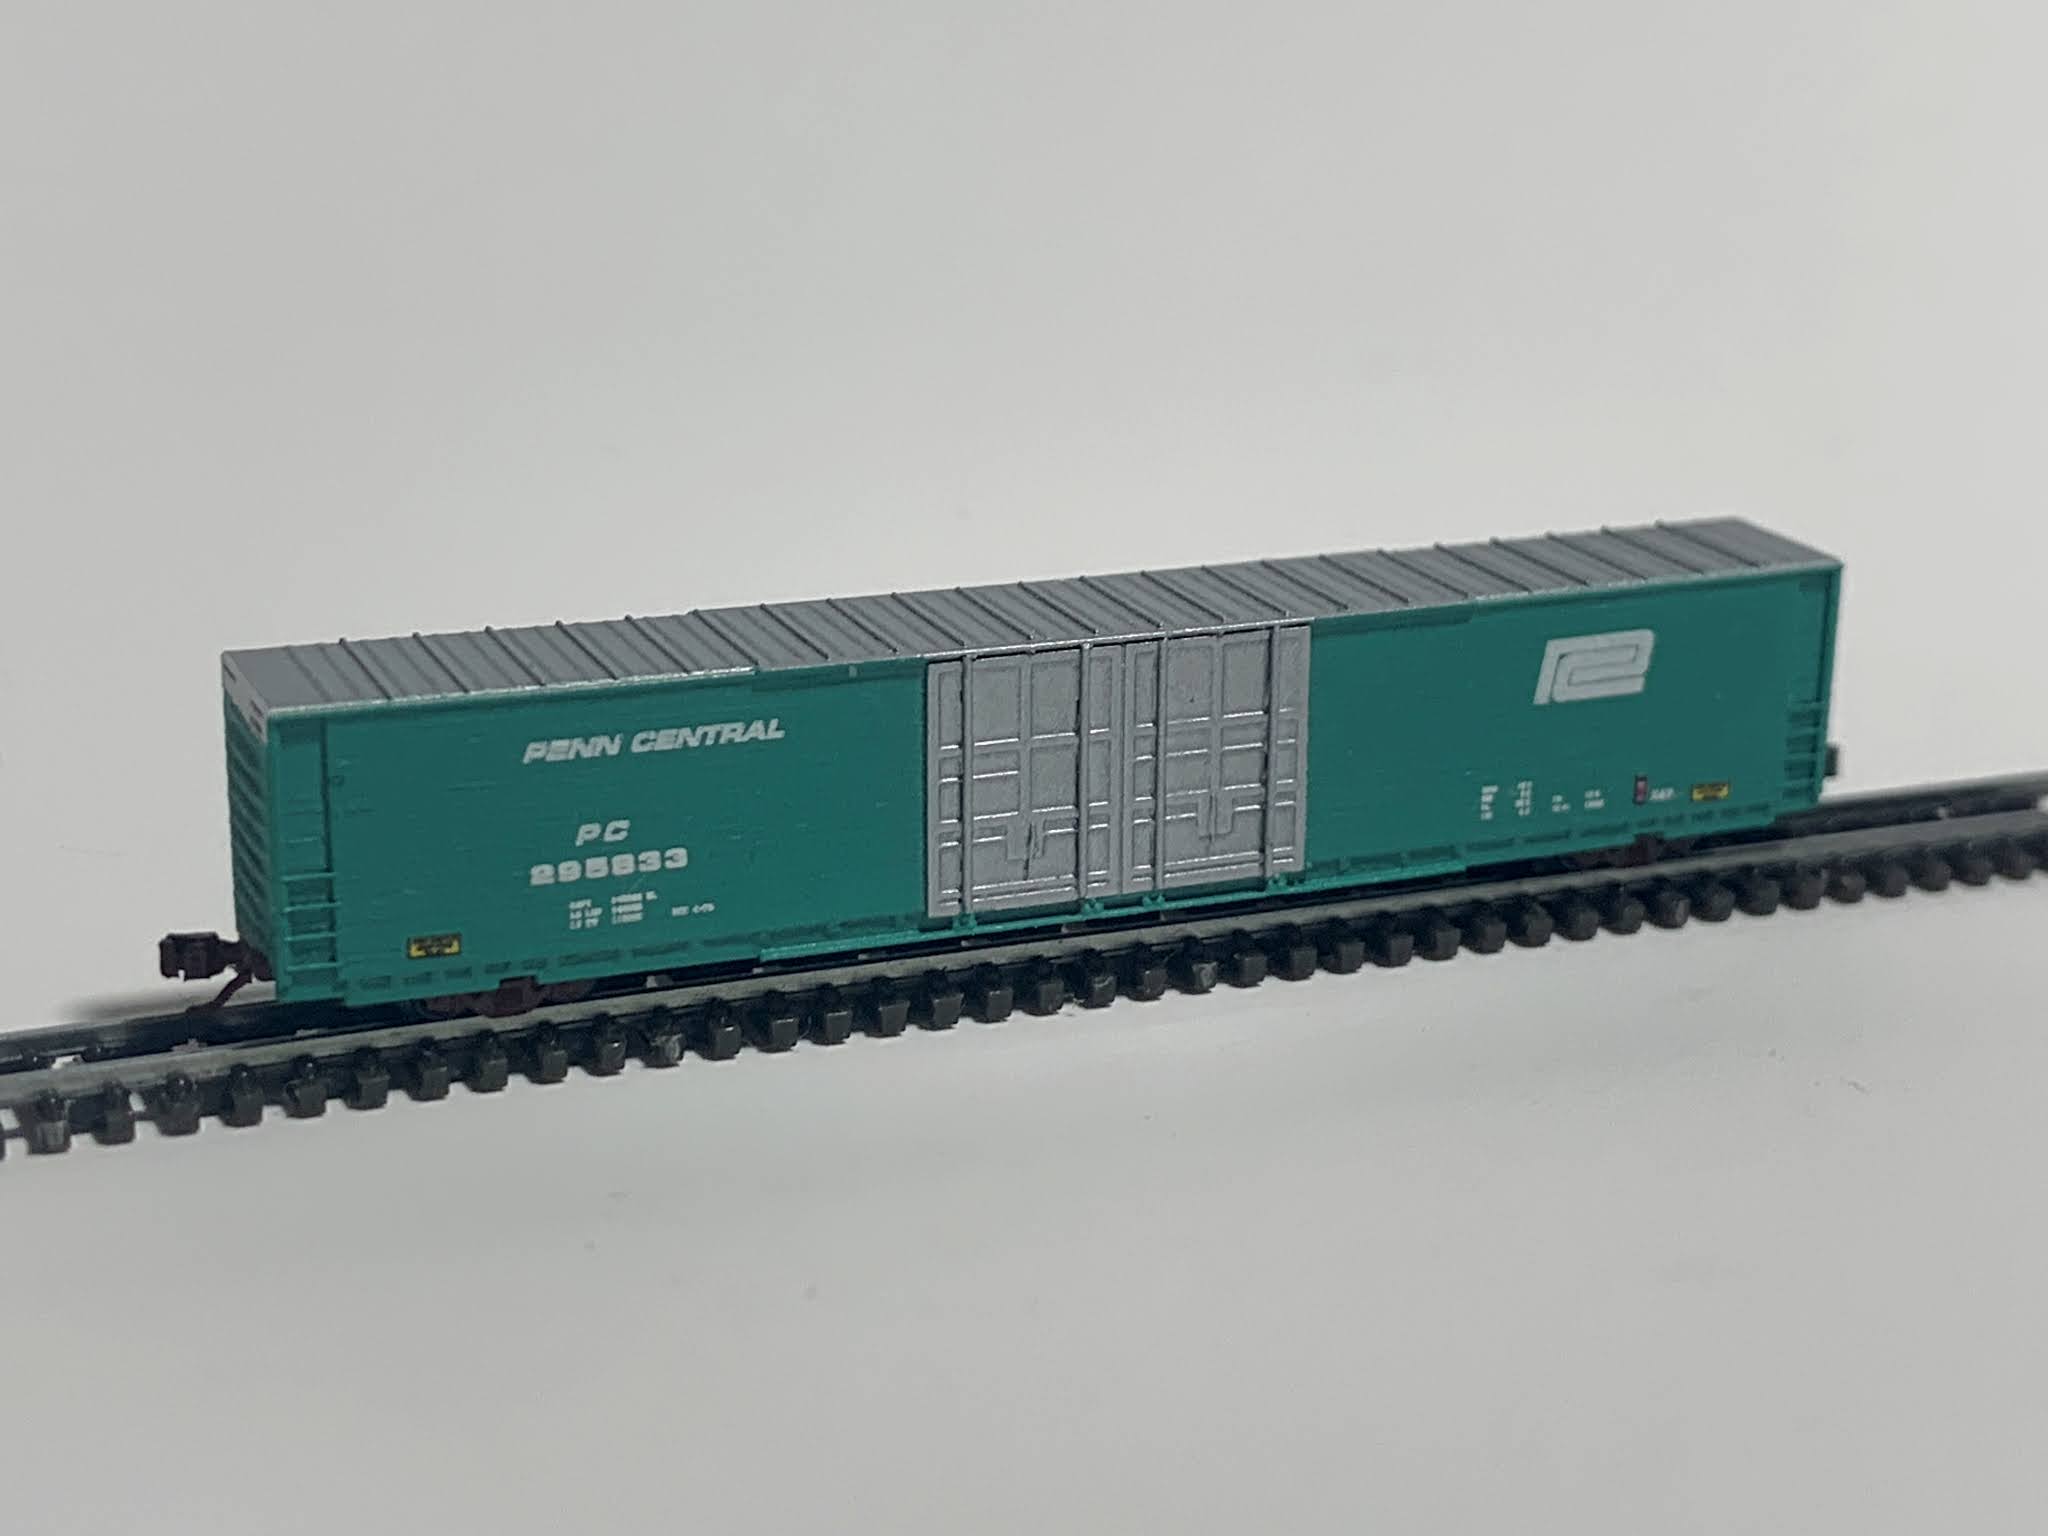


This build is really not difficult, even though very small. As always a magnifying visor is an absolute necessity.  I like how the doors worked out and will be rolling out etched brass doors for all CCE Models with plug-doors.  The use of etched brass for details also opens up some other possiblities such as an enclosed auto rack.. stay "T"uned!   - Jesse  


Friday, May 14, 2021

Innovations and Inspirations

A mid-spring check-in seems due, so in no particular order here is an update of a variety of projects I've been working on.

CCE Drive/Powered Chassis Development:  This has taken about 50% of my time over the last couple months, and quite a lot of progress has been made towards meeting the goal of producing an in-house T-scale chassis.  After several iterations (I am up to version 8), it has evolved into a worm drive, both for simplicity's sake and space savings.  I was successful in finding a very narrow low-voltage motor that fits inside the 3D printed US hood diesel, a GP38.  Here's a v7 chassis in the GP38 (sans fuel tank) while being tested.  


So far, early prototypes of both a GP38 and MP36 with powered chassis have been produced.  The GP38 is the most refined set and the latest version on the v8 chassis is on the way from Shapeways currently.  One of the nice things about the new chassis is the truck design (Blomberg prototype) does not require those blasted bogie attachment springs.  The new challenge, however, is effective electric pick-up, but no worries--I have a plan..  

Other locomotives that have been test fit with the new chassis design include the AEM-7 and GG1 electrics.  Both shells were previously designed and will require minimal adaptation to accept the drive.  Once perfected, the CCE drive will open up a lot of doors for powered North American prototype trains.

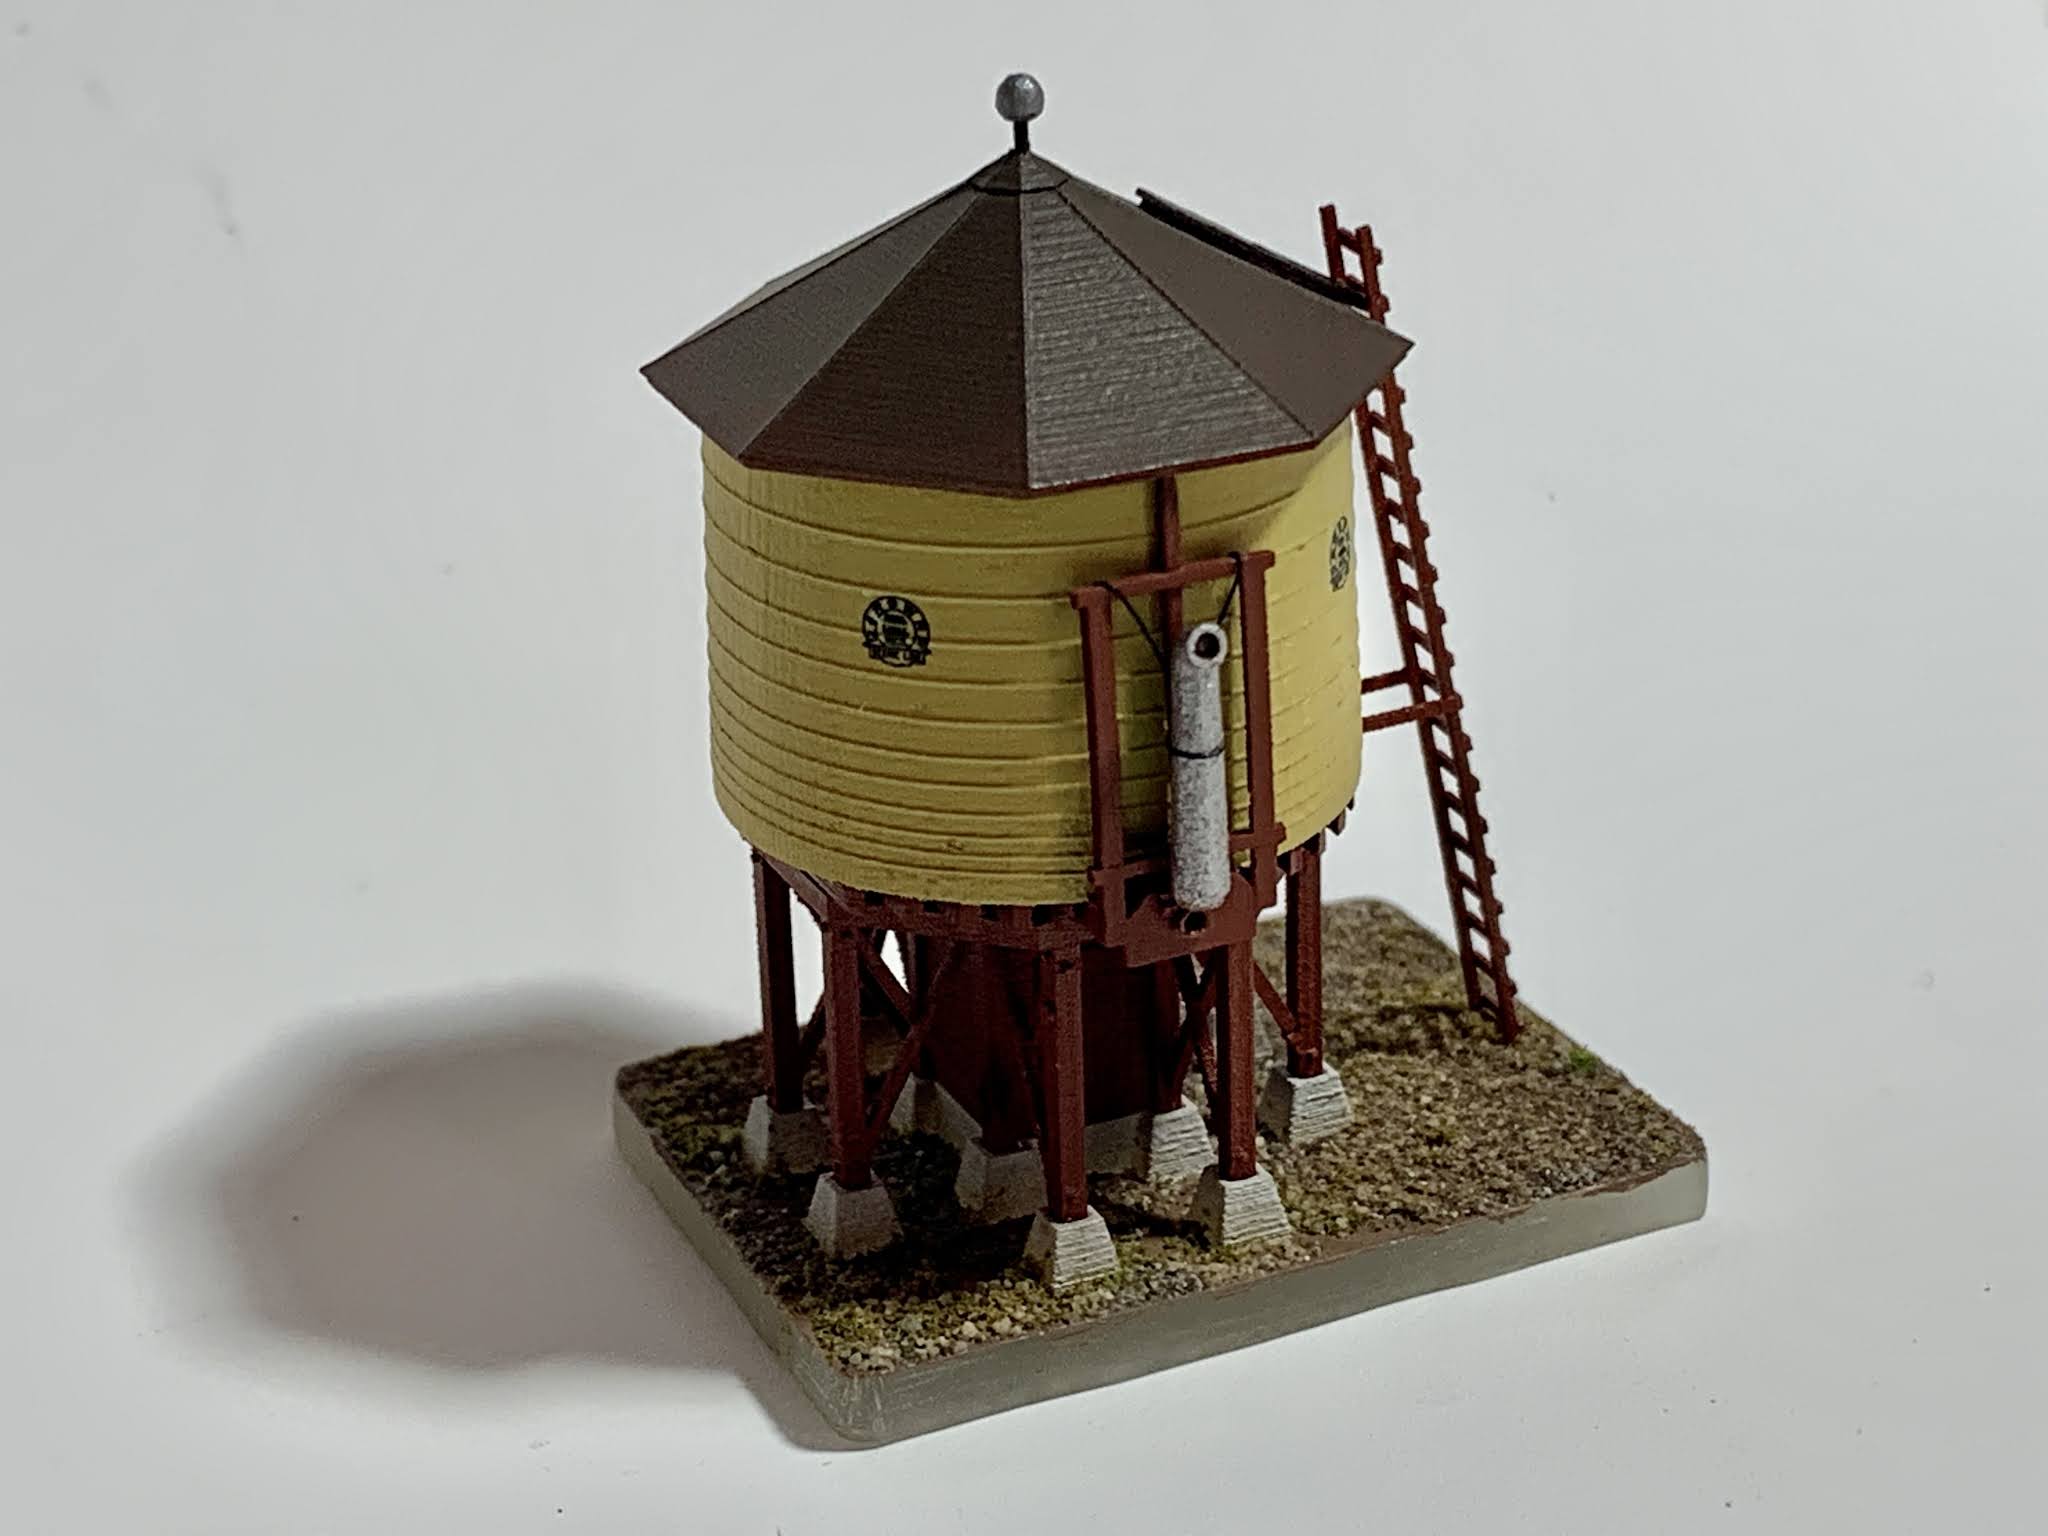
1:300 Water Tank:  I have been experimenting in Mn3 (1:300, 3-foot narrow gauge) and a desire to do a structure yielded this nifty little kit to build a Denver & Rio Grande "Standard" water tank.  Although there was a standard plan (and this model is faithful to it) often the prototypes varied a bit.  But if you go to South Fork, Colorado today, you will find the prototype for this model. 

The "necessary innovation" on this model was using Archer resin decals for the tank straps.  3D printing is great, but cylinders are a trouble spot due to the layering, and thin details like the straps -on- a cylinder are even worse.  The initial test model was great except for the tank.  I got the idea of eliminating the printed-on straps and sanding it a bit to improve it's smoothness, and then applying Archer "seam line" decals.  I happened to have these decals around as a by-product of an N-scale etched signal bridge project.  The "seam line" decals seen here being applied, which are 0.13 mm thick, worked great! 

 Here are the components primed.


And the finished model painted and decals applied. 


PS 5344 Boxcar and BKTY 154675 Graffiti Decal Set:  Some things just beg to be modeled.  As a long-time fan of the Simpsons, when I saw this boxcar adorned with our favorite cartoon duo, "Itchy and Scratchy", I just had to get a photo.  


And after some thought, I decided I wanted a model.  Well, two issues presented themselves:  First, I didn't have the appropriate boxcar model, and second, I didn't have any way to paint that graffiti.  I have done plenty of decals but never a graffiti image, so I figured I would this would be a good learning experience.  Using the photo as a guide, I traced the image using my vector graphics editor, Inkscape.  The PS boxcar came together nicely as well using my stand-by 3D editor, TinkerCad.
I'm currently waiting for the test boxcar from Shapeways, and the decal sheet is ready to be printed.  I'll probably make this available in N scale as well.  Speaking of which, there will be a few N scale items added over at CCE Models.  More on that next time...

Models and New Products in the Pipeline:

--Canadian Grain Board Cylindrical Hopper (with etched end railings/ladders and several different decal sets).  ETA June '21

--CalTrain MP36 Decal Set 

--Etched brass plug doors (3D printed plug doors make me sad.. test frets are on the way!)


Wednesday, February 17, 2021

Drive Evolution--The End of the Beginning


After years of building T scale locomotive models that looked good but were mostly dummies due to the limitations of the available powered chassis, last fall I decided it was time for the development of a CCE Models powered chassis.  Below is a summary of where I've gotten over the past few months. 

The original T-gauge models from K.K. Eishindo were all car-body designs, as have been the vast majority of subsequent models.  They were EMU's like the KIHA-40, and later TGauge.com came out with their beautiful Class 67 diesel.  Common among these designs is that they allow space for the 4mm diameter motors within the shell.  The only exception has been a toy-like "GP8" which is quite out-of-scale because they widened the model to accommodate the motor. 

Pulling power isn't very good--most trains need a ratio of about one powered unit to every 2-3 pieces of rolling stock. All trains benefit from having two powered units regardless--two help smooth out power pick-up issues on track and wheels that become dirty rather quickly.  

In addition, with the available stock chassis there are limited arrangements of truck bolster spacing, and the trucks themselves are based loosely on the Japanese EMU prototype--not applicable to modelers of the US or Canada in the 1980s, or Colorado in the 50s!  Over time, several longer chassis have come from China, the motors have gotten better, and pulse controllers have made the slow speed performance better.  But there's still room for improvement.  

I wanted to design a powered chassis to fit my models properly with regard to truck bolster spacing as well as having prototypical truck appearance.  The coup-de-grace would be one narrow enough to fit in hood diesels.  I also wanted it to be a good running design.  So here were my design criteria:

  • Could fit in American designs--both hood and car-body locomotives.
  • Flexible design to fit different truck spacing.
  • Prototypical looking trucks.
  • Good running.
  • Relatively easy to produce.

Groundwork:  3D design and printing of chassis was clearly a great option for this project, offering the ability to print small quantities at reasonable cost, and adjust designs on-demand.  Having gained considerable experience over the course of making scores of 3D printed models, I felt up to the challenge.  So in the fall of 2020 I took an old chassis, my trusty vernier caliper and ruler and drafted a basic copy of the existing T-gauge chassis in my 3D design software.  I became very familiar with the stock drive arrangement, which uses a crown gear at a right angle to the motor shaft drive gear, and multiple reduction gears to transmit power the drive wheels.   

Frame Fundamentals:  The chassis frame is the main adjustable component in the exercise, and moreover the one I could most easily fabricate.  I needed to be sure the 3D printed materials would be sufficient to withstand regular use but precise enough for micron-size adjustments in gear alignment.  I reasoned the motor and drive gears could be easily scavenged from donor chassis for the time being; they were readily available and proven.  In addition, if needed, other gears could be sourced through various suppliers of micro-airplane and RC car models.  I made a test print of the chassis using Shapeways Smoothest Fine Detail Plastic and it was definitely robust enough to handle plenty of use.  In fact, the acrylic material seems to have a self-lubricating quality to it.   

Shortened Chassis Development:  To meet one of the key design criteria--that of fitting different length carbody units--I needed to be able to shorten the chassis.  Lengthening shouldn't be an issue: just move the power plant/drive train.  I adjusted the chassis design using the principle developed by the modeler David K. Smith, who about a decade ago kit-bashed an Eishindo chassis to make it short enough to fit in a T-scale EMD F7 or F3 carbody.  Using the text of his original article (the pictures were lost when his computer crashed!) I modified the 3D design accordingly and after a couple adjustments found it worked... rather nicely actually.  

As of this writing (2/17) this is where the "proven" technology stands.  The printed chassis is shorter than stock, and utilizes the gears and motor from a donor chassis, and it runs well.  The test chassis has truck bolster centers of 19.5mm, or 29 ft. in 1:450--so in theory any carbody diesel greater than that is possible.  Here's a list of truck bolster centers for reference.

Truck Development:  While working on the shorter chassis I also designed a set of Blomberg trucks that will accept the stock contact strips that would be a one-for-one replacement to the old Japanese prototype trucks in either the printed or stock chassis.  It stands to reason that if these models can be validated, so could CCE Models' AAR-B trucks, or others--even 3 axle.  Beta models of the Blomberg trucks are currently being printed so I should be testing these within the next few weeks.

Hood Width/Worm Drive Chassis Experiments:  As noted, the shorter chassis design above is confined to use with carbody/cab locomotives that have the needed scale width for the mechanism.  The limiting factor is primarily the 4mm diameter motor which sits above the frame.  The width of the standard powered chassis is 5mm (or nearly 7.5ft in scale).  A hood diesel like the GP40 has a long hood width of around 6 ft in scale (4.6mm) or about 0.5mm wider than the standard chassis itself.  

How to configure the chassis to fit in a hood diesel is a real challenge, and several ideas came up.  Use etched brass for hood sides?  I ruled out etching for the time being because it would be complicated and would be difficult to assemble well.  Source a motor with a smaller diameter and narrow the chassis?  It sure would be nice if there were affordable motors less than 4mm diameter but for now they don't exist. 

However, I might have come up with a solution utilizing a worm drive and a different motor configuration.  If my worm drive concept works it should also allow for further reduction in length of the chassis, perhaps even allowing switchers such as the SW1200 to be powered.  Another potential advantage of the worm drive is it may be more powerful and/or smoother-running.  That remains to be seen, however..  I have also speculated on using a flywheel or "keep alive" circuit, although pulse power might make the latter impossible.  A worm drive certainly has potential use in steam power..

There are sure to be additional developments and ups-and-downs, but I'm determined to get this done.  And rest assured all of these designs will be available from CCE Models as soon as I'm confident they are reliable and of value to other T-scale modelers.  

Until next time,

-- Jesse

Monday, December 21, 2020

"T"ools of the "T"rade

 I wanted to pass along some of my favorite tools and tips acquired over the several years of T-scale modeling.  Hopefully you will find this of use in producing high-quality models with as little frustration as possible.  One note: I don't endorse any particular brands, unless noted. 

Ultrasonic Cleaner:  Since most of my models are 3D printed, and the printing process at my preferred service bureau (Shapeways) leaves a waxy residue, all models must be thoroughly cleaned before assembly and painting.  Shapeways does clean the models, but invariably there is still some gunk on them when they arrive.  Some modelers use the solvent Bestine to further clean models, but I don't really need this, preferring not to stink up the house or dip my mits into toxic fluids -- Instead I utilize an ultrasonic cleaner with a warm bath of water with a drop of dish-washing detergent.  The cheap ultrasonic cleaner I have, I found used on Ebay for $20, and is the kind used for jewelry.  No need to go high-end here.  I give models a couple cycles in warm soapy water, once in warm clean water, then a nice rinse-- over a bowl stretched with old panty-hose to catch any parts that might fall off.


Micro Fiberglass Brush Tool:   After I clean a model, I will usually give it a coat of primer--and then inspect the surface for more gunk that may not have come off, or just layering/artifacts from 3D printing.  There is typically a bit of clean-up and sanding needed, and the micro fiberglass "pen" is really great for cleaning and abrading small surfaces and getting into tight areas.  One word of caution--these tools shed fiberglass fibers, so wear a mask and keep a vacuum close-by to get rid of the nasty little hairs.  I'm sure breathing them in isn't good for anyone.

Microbrushes:  These are useful for many things; odd paint jobs, cleaning airbrushes, applying decal solvent..  Beware:  Some of the cheaper brands use an adhesive to adhere the bristles that is susceptible to solvents--this can be a problem if you use with lacquer paints or other solvent-based paints or coatings;  I use acrylic almost exclusively so don't worry about it much, but still prefer the "original" microbrush if you can find them.

Disposable Pipettes:  Mainly for use in painting and mixing for the airbrush--get your ratio of thinner to paint accurate.  Get a big bag for a few dollars, they will last for a long time.  Also useful for micro-basting chicken breasts in the pot.

Etch Bending Jig:  Photoetched brass or steel parts (PE) can be a bit of a pain to get looking correct if you don't use one of these to bend them.  They help keep bends straight/square and even along long surfaces.  I wouldn't even try doing the hopper ends without one of them!  You can also use them to flatten out a piece that has gotten bent, press-style.  This is a small one made in China I found on Ebay, good enough for T-scale;  You may want a bigger one if you model in other scales as well.

While we're talking about PE, definitely get a pair of PE snippers like these by Xuron.  They allow you to trim PE close to the details.  Another tip is to use the steel base of the bending jig as a solid surface upon which to precisely trim PE with a hobby knife (expect the blade to get dulled quickly however).  Trimming on the solid surface will keep the PE from getting deformed. 

Toothpicks: Ahhh yes, the toothpick is indispensable!  Use them for moving decals around, for holding models for handling (as pictured), for making coupler pics, for applying glues, martinis, and a million other uses.  Get a big box for a buck a your local grocery store.


In other news:  I'm due for an update on new models and projects and will be posting that in the near future.  Many exciting projects from rolling stock to structures, too many to mention here.  In the meantime, I hope all my fellow T-scale enthusiasts have a great and safe holiday, and let's hope Santa or a Festivus pal leaves you a 1:450 train under the tree!    - Jesse


Friday, November 6, 2020

Long Time Comin' / Long Time Gone

It's been a busy couple of months and I have been remiss in my Blog posting.. my apologies.  By means of explanation, I was occupied with some exciting new developments in the CCE Models business as well as the on-going T-gauge model design and build activities.  


CCE Models Business Improvements:

CCE Models now has an official website with full e-commerce capability!  The old way where I was selling from an "item list" posted on Facebook, with emails traded, etc. was really cumbersome both for the customer and myself.  Along with that, I changed a major part of CCE Models' sales strategy.   Now, instead of selling 3D printed models, we sell the design itself--more specifically, a license to use the STL design file which you download and use to print your own models.  It save a TON of back-and-forth between the customer, myself and Shapeways (my preferred service bureau).  It also allows the customer to make unlimited prints of the design.  And you can print from your own printer if you have one, although the designs are optimized for Shapeways.  So if you want 20 boxcars you buy one design and print as many as you like (as long as they are for your own use of course.)  Break a coupler?  Just cut off the coupler design and print some of them.

CCE Models still sells actual products too, and the range has been expanded to include photoetched (PE) detail kits and decals.  I do keep most of these products on hand as well, so there are few delays compared to the old system.

I opened the site about a month ago and have not aggressively marketed it, but then again, the market is pretty small anyway.  But here's a bonus for the readers of the blog--a coupon code good for 10% off an order of $25 or more:  TBLOGREADER   Coupon is good from 11/6/20 for the next 30 days! 


New Designs: 

It's been so long since I posted here that I can't remember what the last new design  I posted here was... but here's what's new by way of explanatory pictures.

    1:300 scale (Mn3) D&RGW Long Caboose.  This comes in two versions--one with a peaked roof, and one with a rounded roof.  It also has an interior, complete with pot-bellied stove!  Also the Long Reefer was updated.  This model can conceal a powered chassis.   Both have decals sets available.  And remember, TGauge.com sells flextrack that is perfect for narrow gauge, and CCE Models makes the turnouts (one way dummy turnouts).

 
    1:450 scale (T scale) 50' Combination door boxcar.   This is also large enough to house a powered chassis.   Decal sets for CN and WM (shown) are available.


    ATSF Warbonnet decals for the C40-8W in T-scale:

 
     PC/Conrail X67 hi-cube boxcar in T-scale, along with PC and Conrail decals.

SLSF (Frisco)--BN specific version GP40-2 (and two CN specific locomotives) are now available.  These were made because of customer requests/commissions, but now everyone can get one.


Other work going on:

--Prototyping of Bombardier gallery cars.  These are almost ready, expect on the site any day--see below.

--Improving the internal bearing trucks (used on Amfleet cars, Budd gallery cars, and Bombardier gallery cars.)  These had a couple of issues;  the outside diameter was awkwardly large to the eye (the wheels on the prototype are smallish, at 33").  The new design improves this somewhat although still not 33" to scale;  Also the models were having issues with the axles being printed "stuck"--ie not consistently free rolling.  The latest design addresses these issues.  

--Etched railing kits for the big covered hopper cars (3-bay, and 4-bay) and NE Caboose.  I did one test and it was too fragile to be practical;  Design revised and new test on the way.  Once I get these dialed in I will expand to the other hoppers.

--An ASEA/EMD AEM-7.  The design is almost done.  It will have PE pantographs and can be powered by a 34mm chassis.  Decals are also planned.


--Northeast Corridor station (Princeton Jct.).  These are prototyped and include platform, shelter, and station buildings.  These are intended for my Princeton module which is getting closer to fruition. 

On the drawing board:

--Another hi-cube boxcar (customer request), autorack, and loaded bulkhead flatcar. 

Other models/items of interest:

--I did a set of Conrail H45 covered hopper decals in T, N and HO scale together with some of the fine folks at the Conrail Historical Society.  I will be adding the T-scale set to the website and the other scales may soon be available through the Conrail Historical Society "Conrail Shoppe".  If you're interested in these, let me (or them) know.  Incidentally, I highly recommend joining this non-profit group if you are a Conrail fan or modeler.  They curate tons of great information and make it available thruogh their website, publications, and meetings.  They also restore historic Conrail equipment that would otherwise be scrapped--such as an X67 boxcar like the one I recently modeled.

--I'm working on a commissioned custom painted AWVR AC4400CW.  HO Scale (it's mazzive!)

That's it for now and thanks for reading!  I'll endeavor to get back on a monthly schedule.  As always, if you have any questions feel free to reach out to me at ccetrains@gmail.com, or fill out a contact form at the CCE Models website.


Saturday, August 22, 2020

Power to the People (and Passenger and Freight Cars)

With apologies to John Lennon, this post will show you how I get power "right on" to various rolling stock.  This trick is used to push (or pull) non-poweredT-gauge locomotives.  It's also true in T gauge that there's no such thing as too much power for a train so your passenger cars can be powered even if the locomotive is. This trick is also useful to achieve prototypical truck spacing for some 3D printed cab locomotives or DMU's where the stock mechanism is not correct.  

I've used this technique in the Budd gallery cars (cab and coach), the 40' D&RGW long reefer, as well as in the MP36 locomotive and RDC DMU's.  Several CCE Models are set up specifically for this (as shown below), but the modeler can kitbash using the same principles. 

The idea is pretty simple:  The un-powered end on a TGauge powered chassis is connected by a short horizontal frame to the motor end.  The chassis segment can be cut/discarded, and the un-powered end placed as needed to achieve the desired truck spacing.  Power pickup via the unpowered end can be maintained either through direct contact with the severed contact strips, or by direct wiring.

Here's a 21m chassis, showing where the cuts are made:


After the cuts are made (I just use a rail nipper both for the acetyl plastic and the steel contacts), bend the contacts on the motor end over.  Try to cut the contacts so there's enough room to give it a "curl" at the end--although this isn't really necessary.   If you're shortening the truck spacing, the contacts from the unpowered end can be arranged to sit in the top of the shell in alignment with the motor-end contacts, and maintain continuity.  At least they should..  I have also soldered magnet wire between the contacts to ensure a connection and maintain pickup.  

Here's another view of the cuts and the bent motor-end contacts.  You can see, I was not going for precision..it will be hidden anyway.

Here's an example with contact wires soldered on joining the unpowered and motor end:


Some CCE Models' shells like this Budd Gallery Car have tabs molded into them to retain the chassis segments:


That's it!  

Thanks for reading and best regards until next time.  - J

Monday, July 27, 2020

There Ain't No Cure for the Summertime T-oos

Please excuse the title, I was just listening to some tunes 😁  Here's the latest and greatest on several projects that are coming together.

D&RGW K-36:  Completed the test model, I think the appearance is good!  This one is (sadly) destined to be a garage queen because although it rolls on the leading and trailing trucks, it is not powered.  That being said, the running gear is "phase 1" towards an actual working mechanism.  It did function (main rod, side rod, and cross-head) when test-fit, but I ended up putting a dab of glue on the etched rods to hold them in place.  I have some of the TGauge.com micro rivets, but didn't attempt to rivet them since the drivers aren't set up for it.  Much was learned from the exercise anyway, which will be applied to future mechanisms. For example, drivers will be geared together to ensure synchronization, and will take the aforementioned micro-rivets to hold the etched stainless steel rods (the test model's were brass and too fragile).  Driver construction will be an issue--I'd like to get them turned, but I may try to adapt the T-gauge style of magnetic tires to a 3D printed driver..  Other than that--the locomotive has etched details such as piping, cab windows (need to open them next time), handrails (boiler and tender) and I designed the decals.  I used clear decal film for the windows btw, but forgot to do the doghouse windows before the pics.  On the rear view you can see the etched brass harp-style switch stand.  Not positive if these were used on the D&RGW (I think on the RGS they were..?)  I'm still learning a lot but thought it was an interesting appliance none-the-less.

 Note the "harp" style switch stand on the display.  This is an etched brass kit.  It's small but easy to assemble (just fold up the sides, and the mast can be press-fit.  I painted the masthead/indicator white, then added a scrap of red decal with a bunch of setting solution to get it to settle around the part.  It fits nicely with the narrow-gauge style dummy turnout.


D&RGW 40' refrigerated boxcar, aka "long reefer" is being printed right now, which will be able to house a  mechanisim so there's hope of running (pushing) the K-36 yet.

50 foot tank car:  The prototype tank car model was received and assembled and it turned out nicely.  This is a very common type, based on the DOT-111 style car.  This is available as a kit, along with a set of decals designed for the tank car (the decal set can do several models.)

Class 66:  A modeler reached out regarding the Class 66, a UK/EU prototype.  This model was one of the earlier ones I had in the CCE Models' lineup, so I did a revision to bring the details up to par.  I also included options for modeling it as a dummy with full HTC-R bogies, or just using the HTC-R sideframes to install over sanded down sideframes on a powered mechanism.   To top it off, I have a set of decals designed for the model in multiple paint schemes. 
Low-resolution screen shot


Misc:  
  • Etched end handrail/ladder sets for the 2-bay and 3-bay ACF hoppers were made, I'm working on the test/proof models currently.  Should have them in the next update.
  • Concept is down, design work is planned for a powered mechanism/chassis that will be thin enough to power a hood-style US diesel such as the GP40, GP9, RS11, etc.